/jamf: A Slack app to simplify Mac lookups and troubleshooting

I thoroughly enjoyed presenting at JNUC 2019 – my first presentation outside of Australia. I was an emotional wreck in the lead up to it, but I genuinely enjoyed the experience and was nowhere near as nervous as I thought I would be. It was also great to know that there are macadmins out there that find my Slack app interesting and potentially useful.

I talked about /jamf, a Slack app I created that integrates with Jamf Pro Classic API, in a quest to simplify Mac look ups for the level 1 and 2 techs in my team.

The app effectively lets you run a Jamf Pro ‘advanced computer’ search via Slack, and lets me pick and choose what attributes I want the techs to consider, and allows me to easily qualify those attributes.

This is an example of the app in action:

The app uses the following components:

  • 1 Slack workspace
  • 1 Jamf Pro account with read-only rights to the computer objects
  • 4 AWS Lambda functions
  • 2 API Gateway instances
  • 2 AWS SNS topics
  • 1 AWS Secret Manager secret

I am just going to share code examples for the four Lambda function in this post. I’m not going to go into the how or why of the app in this post, as I hope the presentation slides, in combination with the video, and this post on how to create a basic Slack app, covers that ground enough. But please let me know if there is anything that you think I should explain further or provide more information on.

Here is the video of my JNUC presentation, which covers a bit of the background behind why the Slack app was created in the first place:

The first function is called slackapp_initial_slash_command_invoked.py. Its primary task is to respond to the Slack slash command event and to trigger an SNS event for the second function, slackapp_run_matchSearch.py.

The second function, slackapp_run_matchSearch.py, is responsible for running a match search for the provided search string and returning the results back to Slack.

The third function is slackapp_buttonClicked.py and is responsible for responding to a button click. It effectively just triggers an SNS event so that our fourth function, slackapp_idSearch.py, can go ahead and do a computer search for the particular JSS ID that is associated with that button.

The fourth and final function, slackapp_idSearch.py, does a Jamf Pro API lookup for a particular computer id, and presents a ‘health summary’ back to Slack.

slackapp_idSearch.py presents some general items (computer name, last check-in time, hardware type, etc.) in the health summary but it also displays the results of all extension attributes with the string “slack -” in its name. This means that if I wanted to add or remove a new EA from the health summary I simply need to adjust its name.

The script below is an example of one such extension attribute. I am referring to a slack emoji in the ea name, which Slack will actually go ahead and display as the relevant emoji in the summary output.

In the extension attribute output I provide users with a clickable link to either a relevant knowledge base article or to a Jamf Self Service policy. I only use the jamfselfservice:// links for the /mymac results, as they are only useful if being clicked from the computer that you are wanting to run the policy on, which is not the case when /jamf is used by a tech.

Another thing that slackapp_idSearch.py searches for is any smart or static groups that the Mac belongs to that have a warning emoji in their title. This is because I have found that I’m usually only interested in smart group memberships that indicate a “bad thing”. But you could easily make it so that simply displays all groups that have a particular string or a variety of emojis in their name.

And that’s it!

Reach out to me via here or in the macadmin Slack workspace if you have any questions 🙂

I’d like to thank the fine folk at Jamf for accepting my presentation proposal for JNUC 2019, and for making it a wonderful event full of supportive and friendly peers ❤️

Creating a super basic Slack app using AWS and Python

As I worked through creating my Jamf Slackbot, I realised early on that the biggest challenge was just getting my head around what kind of payload my Lambda function received. This was due to the fact that the different events that I was dealing with,

A slash command

A button click

An SNS trigger

all resulted in slightly different payloads being sent to Lambda.

So in an attempt to help others understand the distinction, I’ve created a step by step guide on creating a basic Slack app that does nothing but write back to Slack the payload that it receives from both a slash command and from a button click event.

Step 1. Create the AWS Lambda function

Create and log in to your free AWS account. Select the Lambda service from the All Services list.

Click the Create function button, and select the option to Author from scratch, use Python 3.7, and create a new execution role with basic Lambda permissions.

The function name can be whatever you like, but in this example I am calling it slash_command_invoked

Step 2. Configure the function’s API

Once the function has been created, click the Add trigger button. From the trigger configuration drop-down, select API Gateway and from the API drop-down select Create a new API.

Set the Security as Open, and click Add.

Your lambda function now has its very own API, which we will provide to Slack later on.

Step 3. Update the Lambda function code

This function is going to simply receive the urlencoded payload from Slack, and return to it a summary of the event data and the event body both before and after decoding.

Step 4. Create the Slack app

Log in to Slack’s API portal and select Your Apps.

Click Create New App

Give your app a name and select the workspace that it will belong to.

From the apps Features list, click Slash Commands

Give your slash command a meaningful name, description and usage hint, and set the Request URL to that API URL that we generated in Step 2 above. In this example we are making the slash command /hello.

Under Settings, select to Install App into your workspace. Click Install App to Workspace and then Allow to provide it with the necessary workspace access.

In Slack, you should now be able to see your slash command appear as an option when you type / in a message box (in any channel). If you go ahead and enter /hello to invoke the slash command, you will get back the request body of your slash command in its original urlencoded format, as well as as the dictionary type that we converted it to in our Lambda function.

Step 5. Add the button component

Although our app is giving us the slash command payload, clicking that button that it comes with won’t do anything at this point. This is because we haven’t told Slack where to send that button click event data to.

Before we can do that, we have to create a new lambda function and generate a new API URL to it. This requires just following the exact same steps in steps 1 and 2 above, but obviously giving our second function a different name – in my example I named it slash_command_button_clicked.

The function code is fairly straightforward. We are receiving the urlencoded payload from the button being clicked, and converting it into much friendlier json format. We are then returning back to Slack a summary of the event data and the event body both before and after decoding.

Step 6. Update the Slack app settings so that it knows where to send the button click request data to.

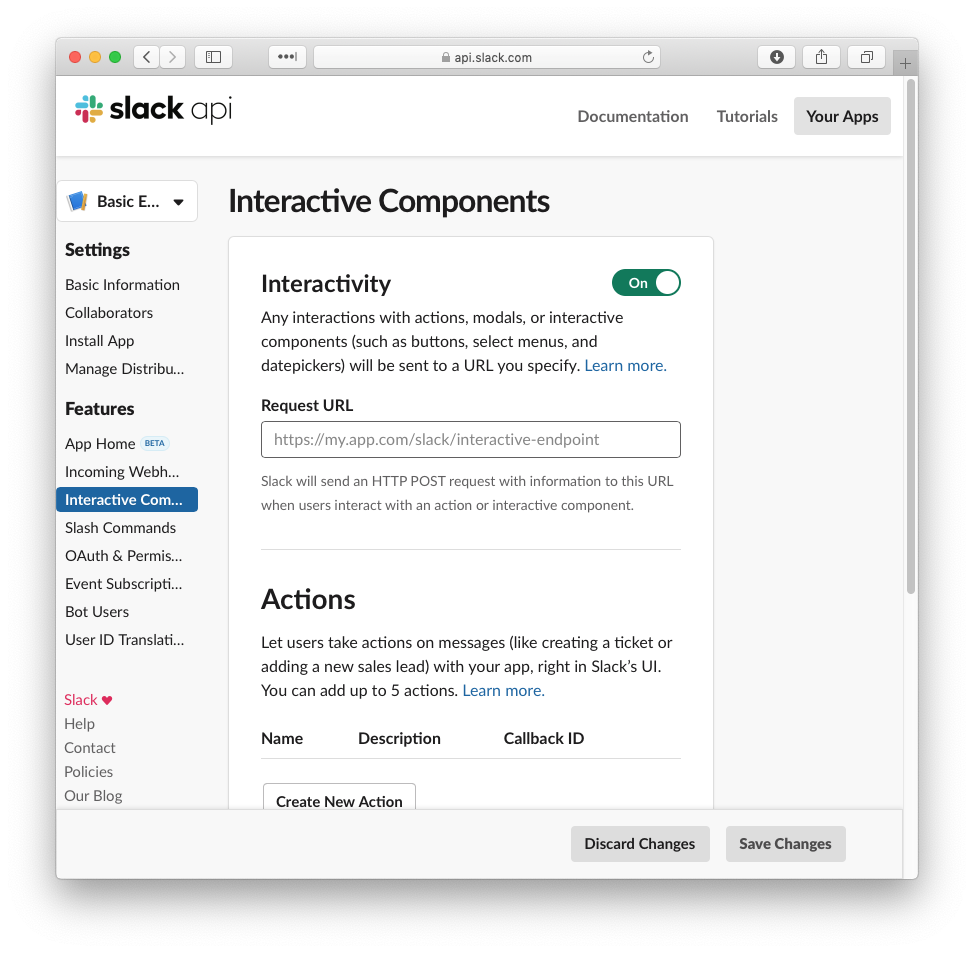
In the Slack API portal for your app, select Interactive Components, from the Features list. Toggle Interactivity On, and in the Request URL field provide the API URL that we generated for slash_command_button_clicked.

Save your changes and confirm that our /hello command now responds to the button being clicked. Clicking the button should now result in the additional payload summary being displayed.

Hope it helps – please reach out if there is anything that I’ve missed!

Thank you, JNUC2019!

Had the amazing opportunity to present today at JNUC 2019. It was my second time as an attendee and my first time as a presenter.

Although it was super nerve wracking, it was no way as embarrassing as I had feared, which means that it was a total success. I’m super grateful for the opportunity, and have loved every minute of JNUC so far.

Here are my slides from today’s presentation

/jamf : A Slack app to simplify Mac lookups and troubleshooting. 

I aim to have code examples for a generic Slack app, as well as more /jamf and /mymac code snippets available on this blog soon!

I also participated in the Supporting Women in Tech panel, which was a lot of fun. Total shame that we were scheduled at the same time as Apple’s non-recorded presentation about Catalina. But the questions and participation from the audience was still very awesome.


Trigger and MenuBarTrigger for macOS 10.15 Catalina

Apple have announced that all third-party apps will need to be notarized in order to run on macOS 10.15. For this reason, I have had both Trigger and MenuBarTrigger notarized and available to download here:

Trigger v1.5 dmg

MenuBarTrigger v1.1

I’m hoping that both these versions will work with 10.15, once it is released, but will update this post to confirm this once the golden release of our new friend Catalina is out. So far I have verified that everything works as expected in macOS 10.15 19A546D (beta 7) and macOS 10.14.3.

Update: they work 🙂

Presenting our DEP workflow at the Jamf Roadshow ✈️

This week I’ve been lucky enough to be asked by Jamf to present at the Australian/New Zealand roadshow, to demonstrate how we leverage Apple’s DEP and Jamf’s Jamf Pro to build our Macs at SEEK.

I’m super excited to present at my first roadshow tomorrow, in Auckland –  and I am very much looking forward to being surrounded by kiwi accents for two days!

In my short presentation, I step through our deployment workflow types, our workflow requirements, and the tools and services used to build it.

In the meantime, here’s a brief summary of the requirements that I considered when designing a Mac build workflow for SEEK, and a link to the tools and services I used to bring it all together.

Workflow requirements

When designing our build workflow, we had to make sure that it covered the standard Mac MOE requirement of installing core applications and settings, as well as the following:

  • A workflow that works whether it is being carried out by a deployment technician or by the primary user of the Mac
  • We want the primary user of the Mac to be a local computer admin
  • We want there to be a second admin computer account for the tech team, and for this account to have a unique password
  • We need the computer to be FileVault encrypted, and for both accounts to be FileVault enabled
  • We need our Macs to have a particular computer name
  • A workflow that allows the end user to continue using the Mac throughout the build process
  • We want to be able to inform the user, be it a tech or an end-user, of the progress of the build
  • We want the ability to interact with them, to be able to gather information from them, if required
  • We want the build workflow to begin as soon as the first user logs in to the Mac – right after the Apple Setup stage
  • And finally, we want to keep track of Macs once they are built – we want to send a summary report to a private tech team Slack channel

Tools and Services

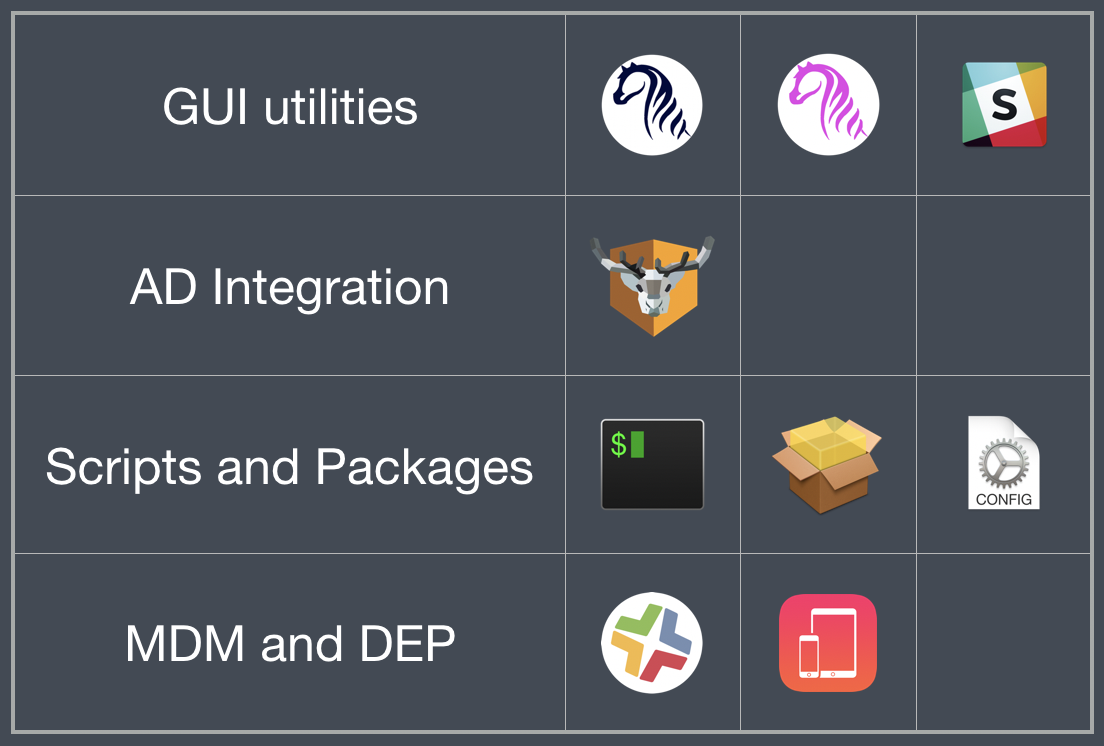
  • And of course, a whole bunch of scripts and packages on our Jamf Pro server, made possible with the magic of Jamf Pro and DEP

I will share more content about this topic in the coming days/weeks, including the demo that I’m showing at the Roadshow and some extra code snippets that I didn’t have time to include in my allocated time, but if there’s anything you are particularly interested in, or if you have any questions, hit me up in the comments section below or message me on Twitter.

Using MenuBarTrigger to show deployment progress

Step 1: Install MenuBarTriggerh

Step 2: Install the icon files locally on your test Mac. The ones used in this example (and referenced in the script) can be installed using MenuBarTrigger Example Icon Files pkg

Note: The script also makes reference to a progress wheel gif file – for the gif to animate it needs to be hosted online, so my example script points to a hosted version.

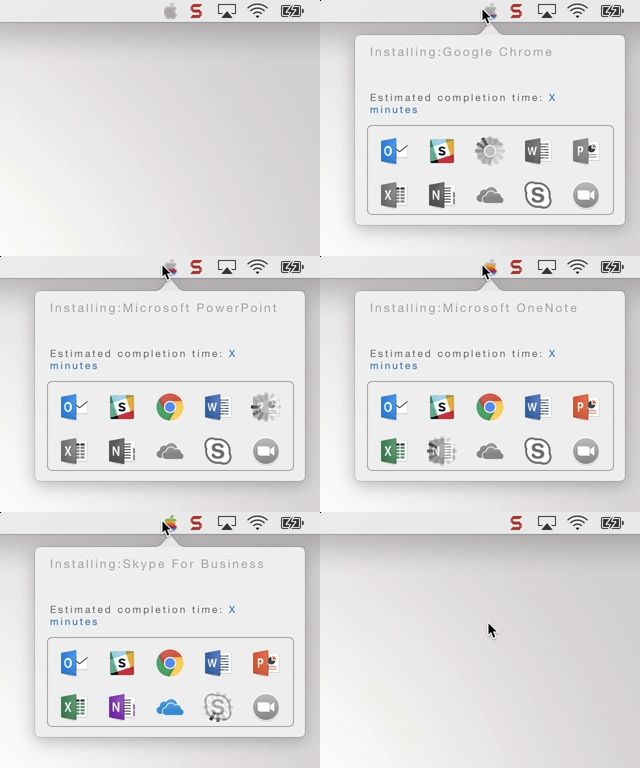
Step 3: Run the script below. You can run it as a policy payload or just locally from your test Mac. The function create_webviews creates the 11 HTML files that will be presented in the pop-over. This is followed by the actual MenuBarTrigger call, which stipulates which command to run with which webview, the dimensions of the pop-up, and the icon to show on the menubar.

The example script only uses the ‘sleep 5’ command, but you would replace this command with the actual Jamf Pro or bash commands that you want to run at each step. For example:

/usr/local/MenuBarTrigger.app/Contents/MacOS/MenuBarTrigger --file /var/tmp/1.html "policy -trigger outlook" \
--file /var/tmp/2.html "policy -trigger slack --icon /var/tmp/images/apple2.png" \
--file /var/tmp/3.html "policy -trigger chrome --icon /var/tmp/images/apple3.png" \
--file /var/tmp/4.html "policy -trigger word --icon /var/tmp/images/apple4.png" \
--file /var/tmp/5.html "policy -trigger powerpoint --icon /var/tmp/images/apple5.png" \
--file /var/tmp/6.html "policy -trigger excel --icon /var/tmp/images/apple6.png" \
--file /var/tmp/7.html "policy -trigger onenote --icon /var/tmp/images/apple7.png" \
--file /var/tmp/8.html "policy -trigger onedrive --icon /var/tmp/images/apple8.png" \
--file /var/tmp/9.html "policy -trigger skype --icon /var/tmp/images/apple9.png" \
--file /var/tmp/10.html "policy -trigger zoom --icon /var/tmp/images/apple10.png" \
--file /var/tmp/11.html "wait --icon /var/tmp/images/apple11.png" \
--width 270 --height 190 --icon /var/tmp/images/apple1.png

The last webview uses a ‘wait’ command, which means that the menubar item stays there until a button is clicked within the webview. In this case it is a “Reboot” button, but there is no subsequent reboot action carried out in our example script.

Example script will result in something that looks like this

MenuBarTrigger, a menubar utility for macOS admins

What does it do? MenuBarTrigger is a command-line utility that presents a menubar popover while simultaneously executing a shell command. The popover is a locally hosted webview. You can give MenuBarTrigger more than one web view and command to present, in which case it will move on to the next pair once the previous command finishes executing.

If the web view content has form input elements, eg. a checkbox, placed within the <form></form> tags, MenuBarTrigger can send the input value to standard output.

Each webview/command pair can have an icon allocated to it, so that the menubar icon changes as MenuBarTrigger progresses along the webview/command chain.

How exactly is it used?Below is the output of Trigger’s –help flag.

How does one get it? MenuBarTrigger is an open-source utility.

You can also get the latest prebuilt .app here.

Usage:

MenuBarTrigger.app/Contents/MacOS/MenuBarTrigger webview1 command1 webview2 command2 ... [OPTIONS]

WEBVIEW

The local HTML file or HTML string to display -f, –file OR -html, –html 

COMMAND

The command to execute. Command can be a shell command or a jamf binary command.

Example shell commands: 

‘sleep 5’

‘/tmp/a_script.sh’

“/usr/sbin/installer -package ‘/tmp/CocoaDialog v2.1.1.pkg’ -target /”

Note the single quotes to wrap around the filename with spaces.

Accepted jamf commands: All jamf verbs, although be warned that MenuBarTrigger has only been tested with jamf binary versions 9.61 – 9.97, so far. Note: MenuBarTrigger assumes that the binary is in /usr/local/bin/jamf. Specify fullpath if you relocated the binary. MenuBarTrigger needs to be run as root to run jamf commands.

Example jamf commands:

“policy -trigger ‘microsoft office'”

“policy -trigger vlc”

“recon”

There is one special MenuBarTrigger commands: wait

wait displays the webView until a particular link on the presented HTML.

MenuBarTrigger.app/Contents/MacOS/MenuBarTrigger WEBVIEW wait

What occurs once the link is clicked depends on the url:

  • A link to “next”, eg. <a href="http://next">NEXT</a>, makes MenuBarTrigger proceed to the next web view/command pair.
  • A link to “formParse”, eg. <a href="http://formParse">Submit</a>, will inspect any form values and return the results to stdout. before proceeding to the next web view/command pair.
  • A link to “quit”, eg. <a href="http://quit">Done</a>, terminates MenuBarTrigger. Be sure to add http:// in the link URL (required by macOS 10.12.4+)

COMMAND –icon 

Changes the menubar icon at the same time as the command is being run. Icon image file should be .png format and 16x16px in size.

COMMAND,NAME

If an output file is specified (see ‘-o, –output’ option below), all named commands have their stdout and success status written to this file. A command is named by appending a comma followed by the name in quotations. eg. “policy -trigger mcafee”,”McAfee Security Agent”

OPTIONS

–icon Sets menubar icon. Icon file should be .png format and 16×16 pixels in size. If this option is not set then the MenuBarTrigger icon is displayed instead.

-h, –height Height, in pixels, of content window. Must be within the minimum and maximum height of the content window. The range for this display is 20 – 701 pixels. Default height is 420px.

-w, –width Width, in pixels, of content window. Must be within the minimum and maximum width of the content window. The range for this display is 20 – 801 pixels. Default width is 420px.

EXAMPLES

/usr/local/MenuBarTrigger.app/Contents/MacOS/MenuBarTrigger --file /tmp/o365_installation_progress.html "policy -trigger o365 --icon /tmp/o365-icon.png" --width 325 --height 190
/usr/local/MenuBarTrigger.app/Contents/MacOS/MenuBarTrigger --file /tmp/zoom_installation_progress.html "policy -trigger zoom --icon /tmp/zoom-icon.png" --icon /tmp/setup-icon.png

Jamf Pro Reporter: a Slack Webhook to help keep track of Mac deployments

As the number of Mac deployments began to ramp up at my work it became apparent to me very quickly that I needed an easy way to keep track of what was being built, and when. As we began having more Macs built in different timezones, it became harder for me to quality check each new Mac setup.

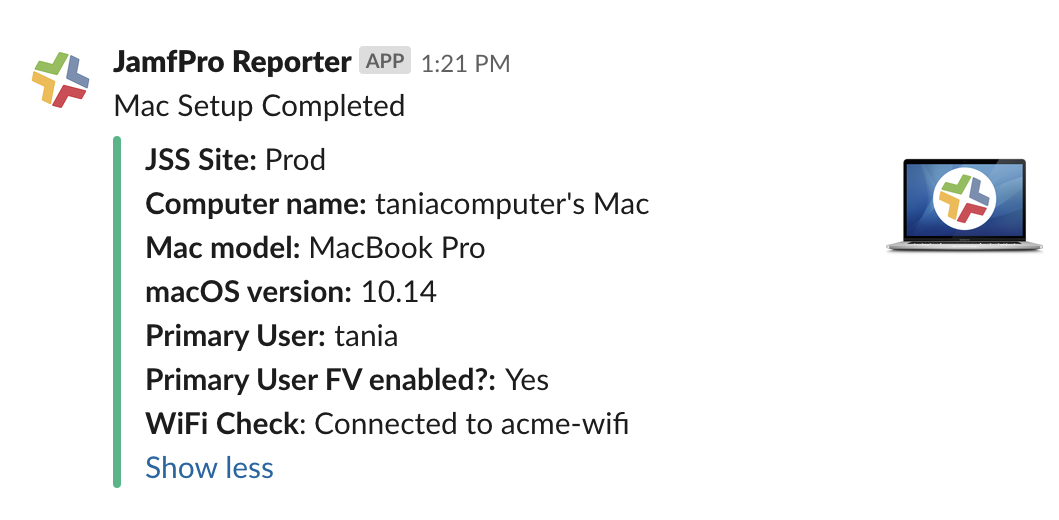
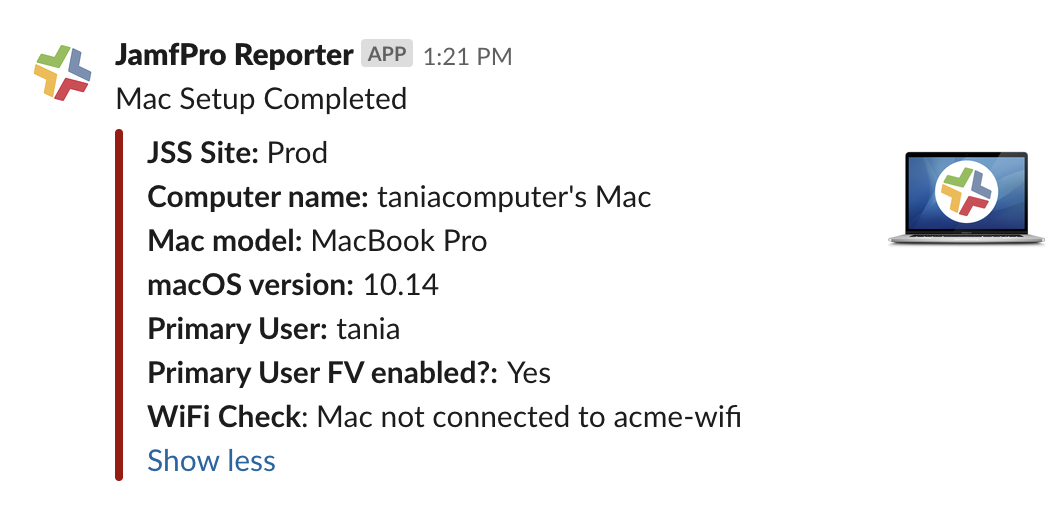
I also wanted to make sure that there was greater visibility in regards to failed Mac builds, beyond relying on emails from the JSS about failed policies. So I decided to create a Slack ‘Jamf Pro Reporter’, to post to a team ‘client computing fyi’ channel at the end of every Mac build. The post would be a summary of the kinds of things that I want to make sure we got right – does it have the correct computer name? Is the username of the primary user of the Mac correct? Is FileVault encryption enabled and is the primary user a FileVault enabled user? Is the Mac successfully connecting to the corporate wifi?

I also wanted there to be a clear green/red visual cue if the deployment was successful or not. The final product looked something like this:

A successful Mac build 🙂
An unsuccessful Mac build :’-(

Steps to creating JamfPro Reporter:

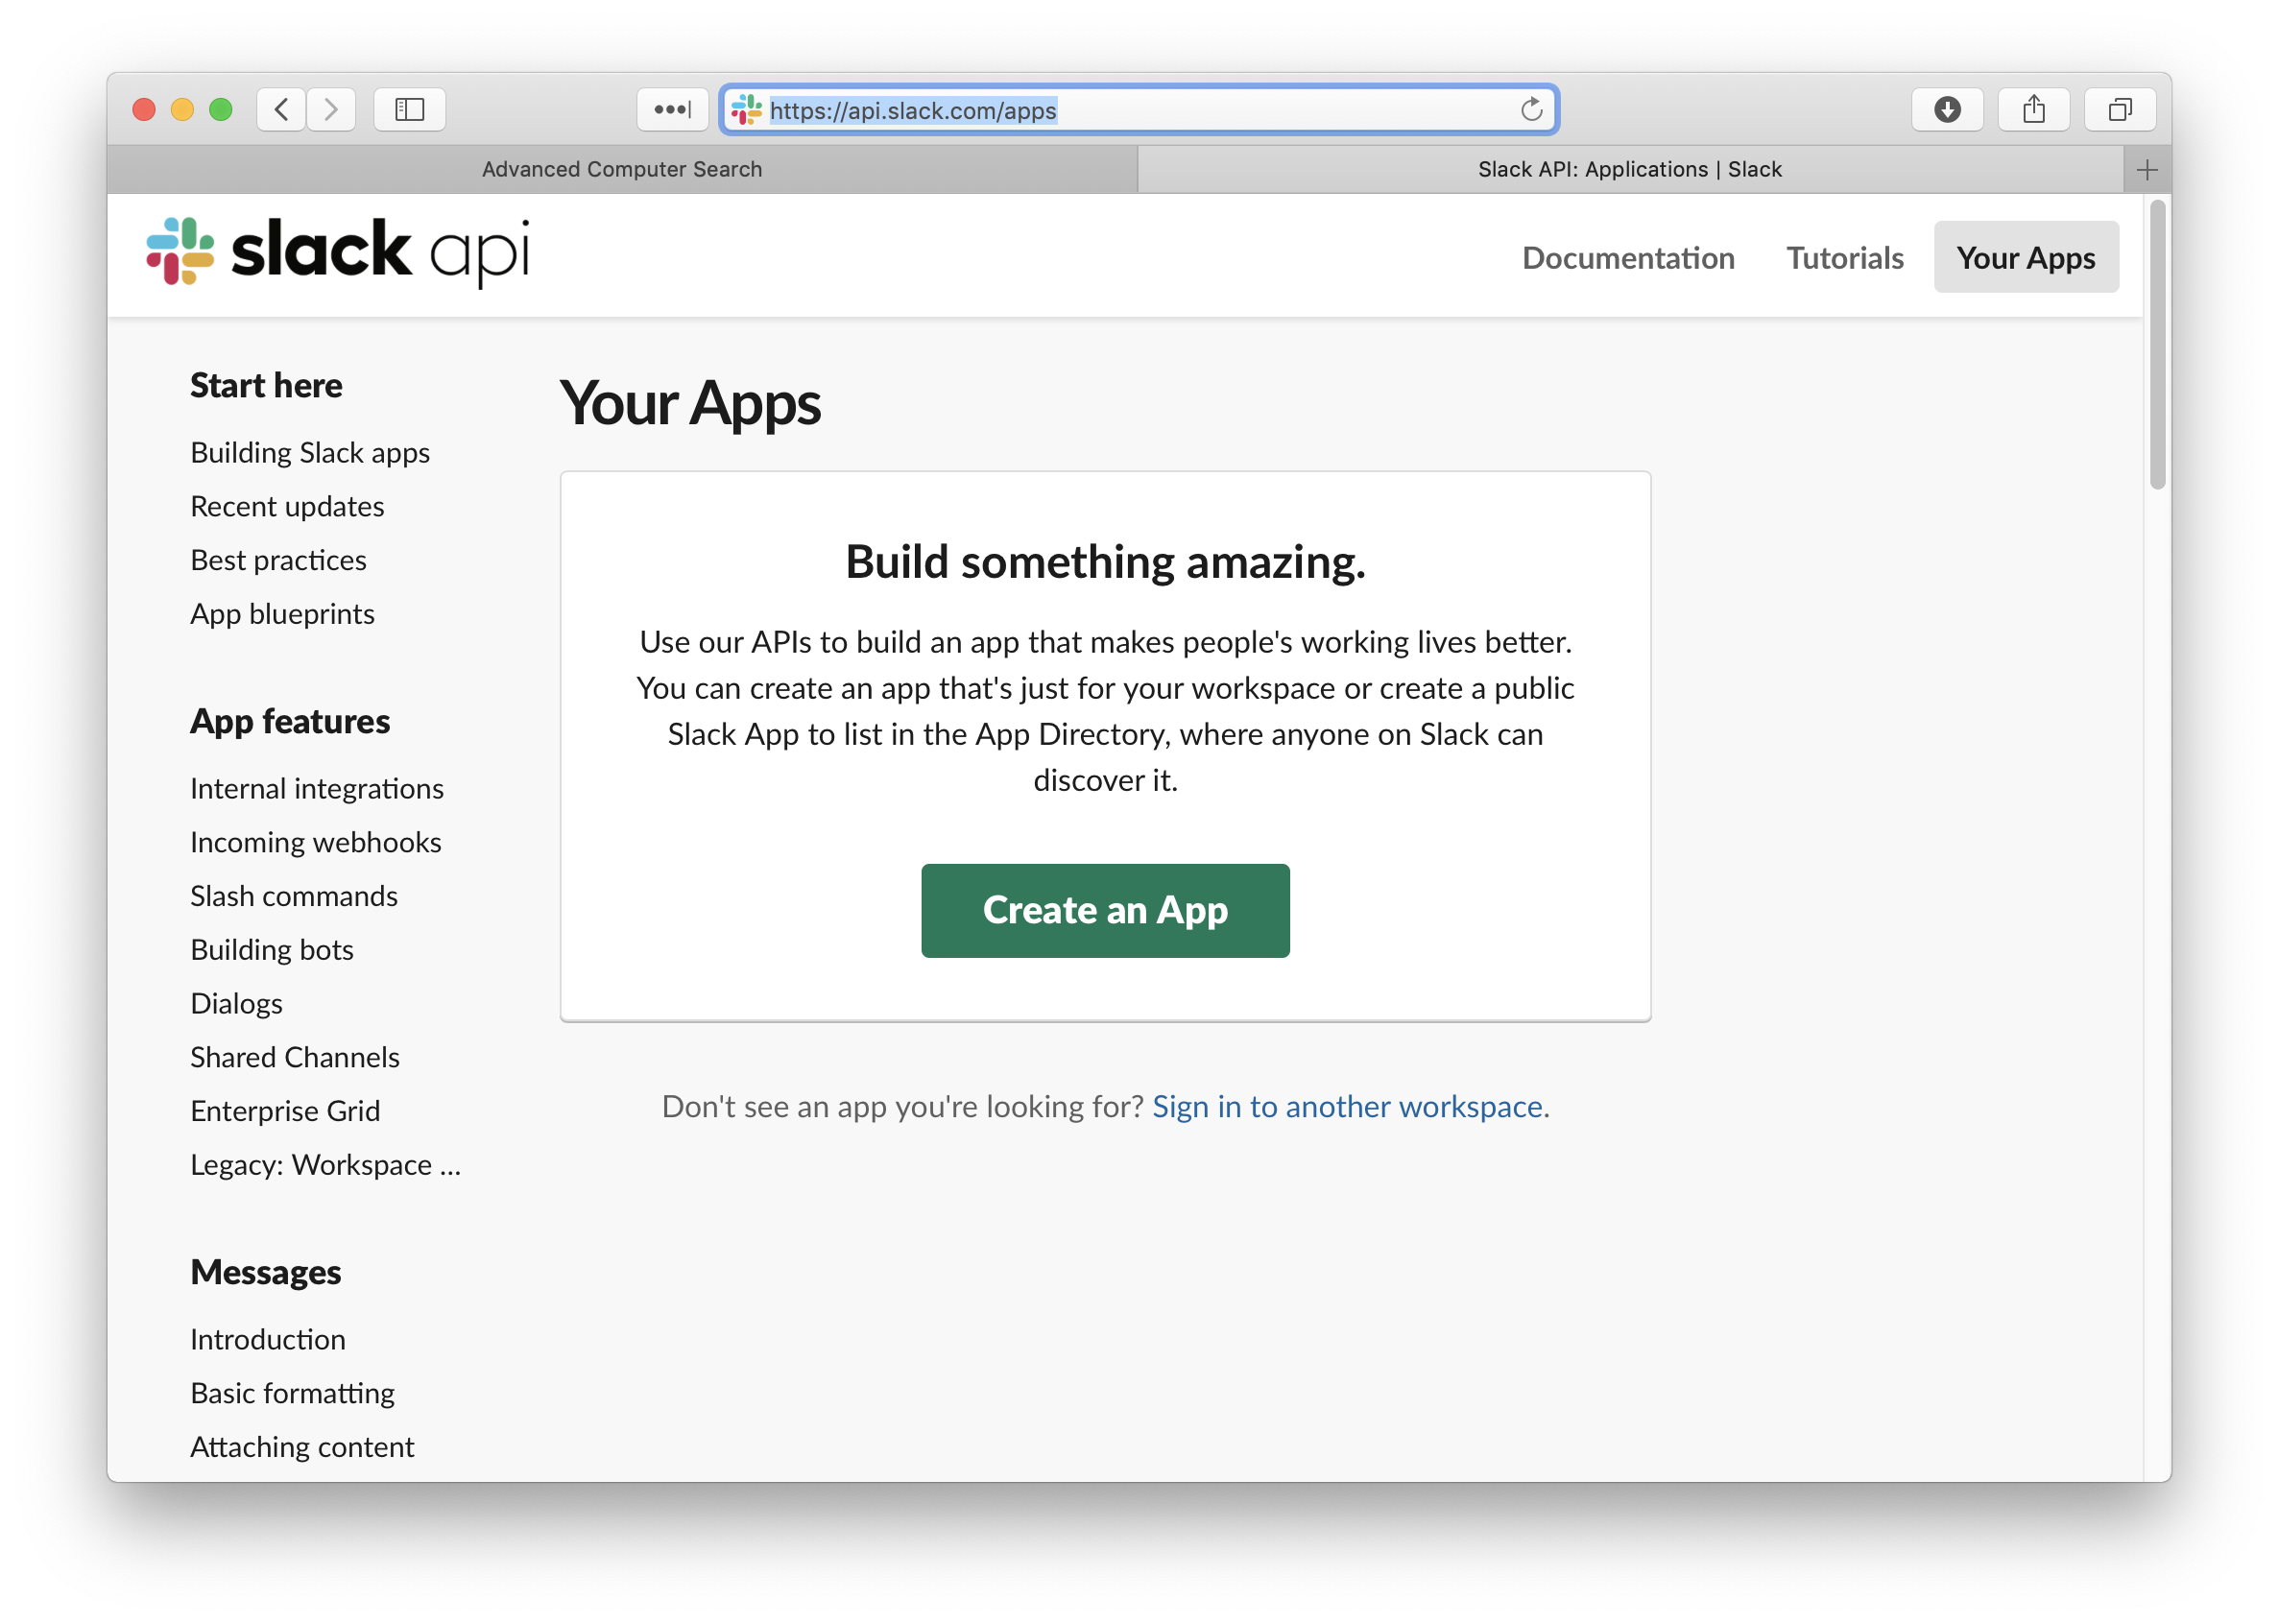
Open api.slack.com/apps and click Create an App
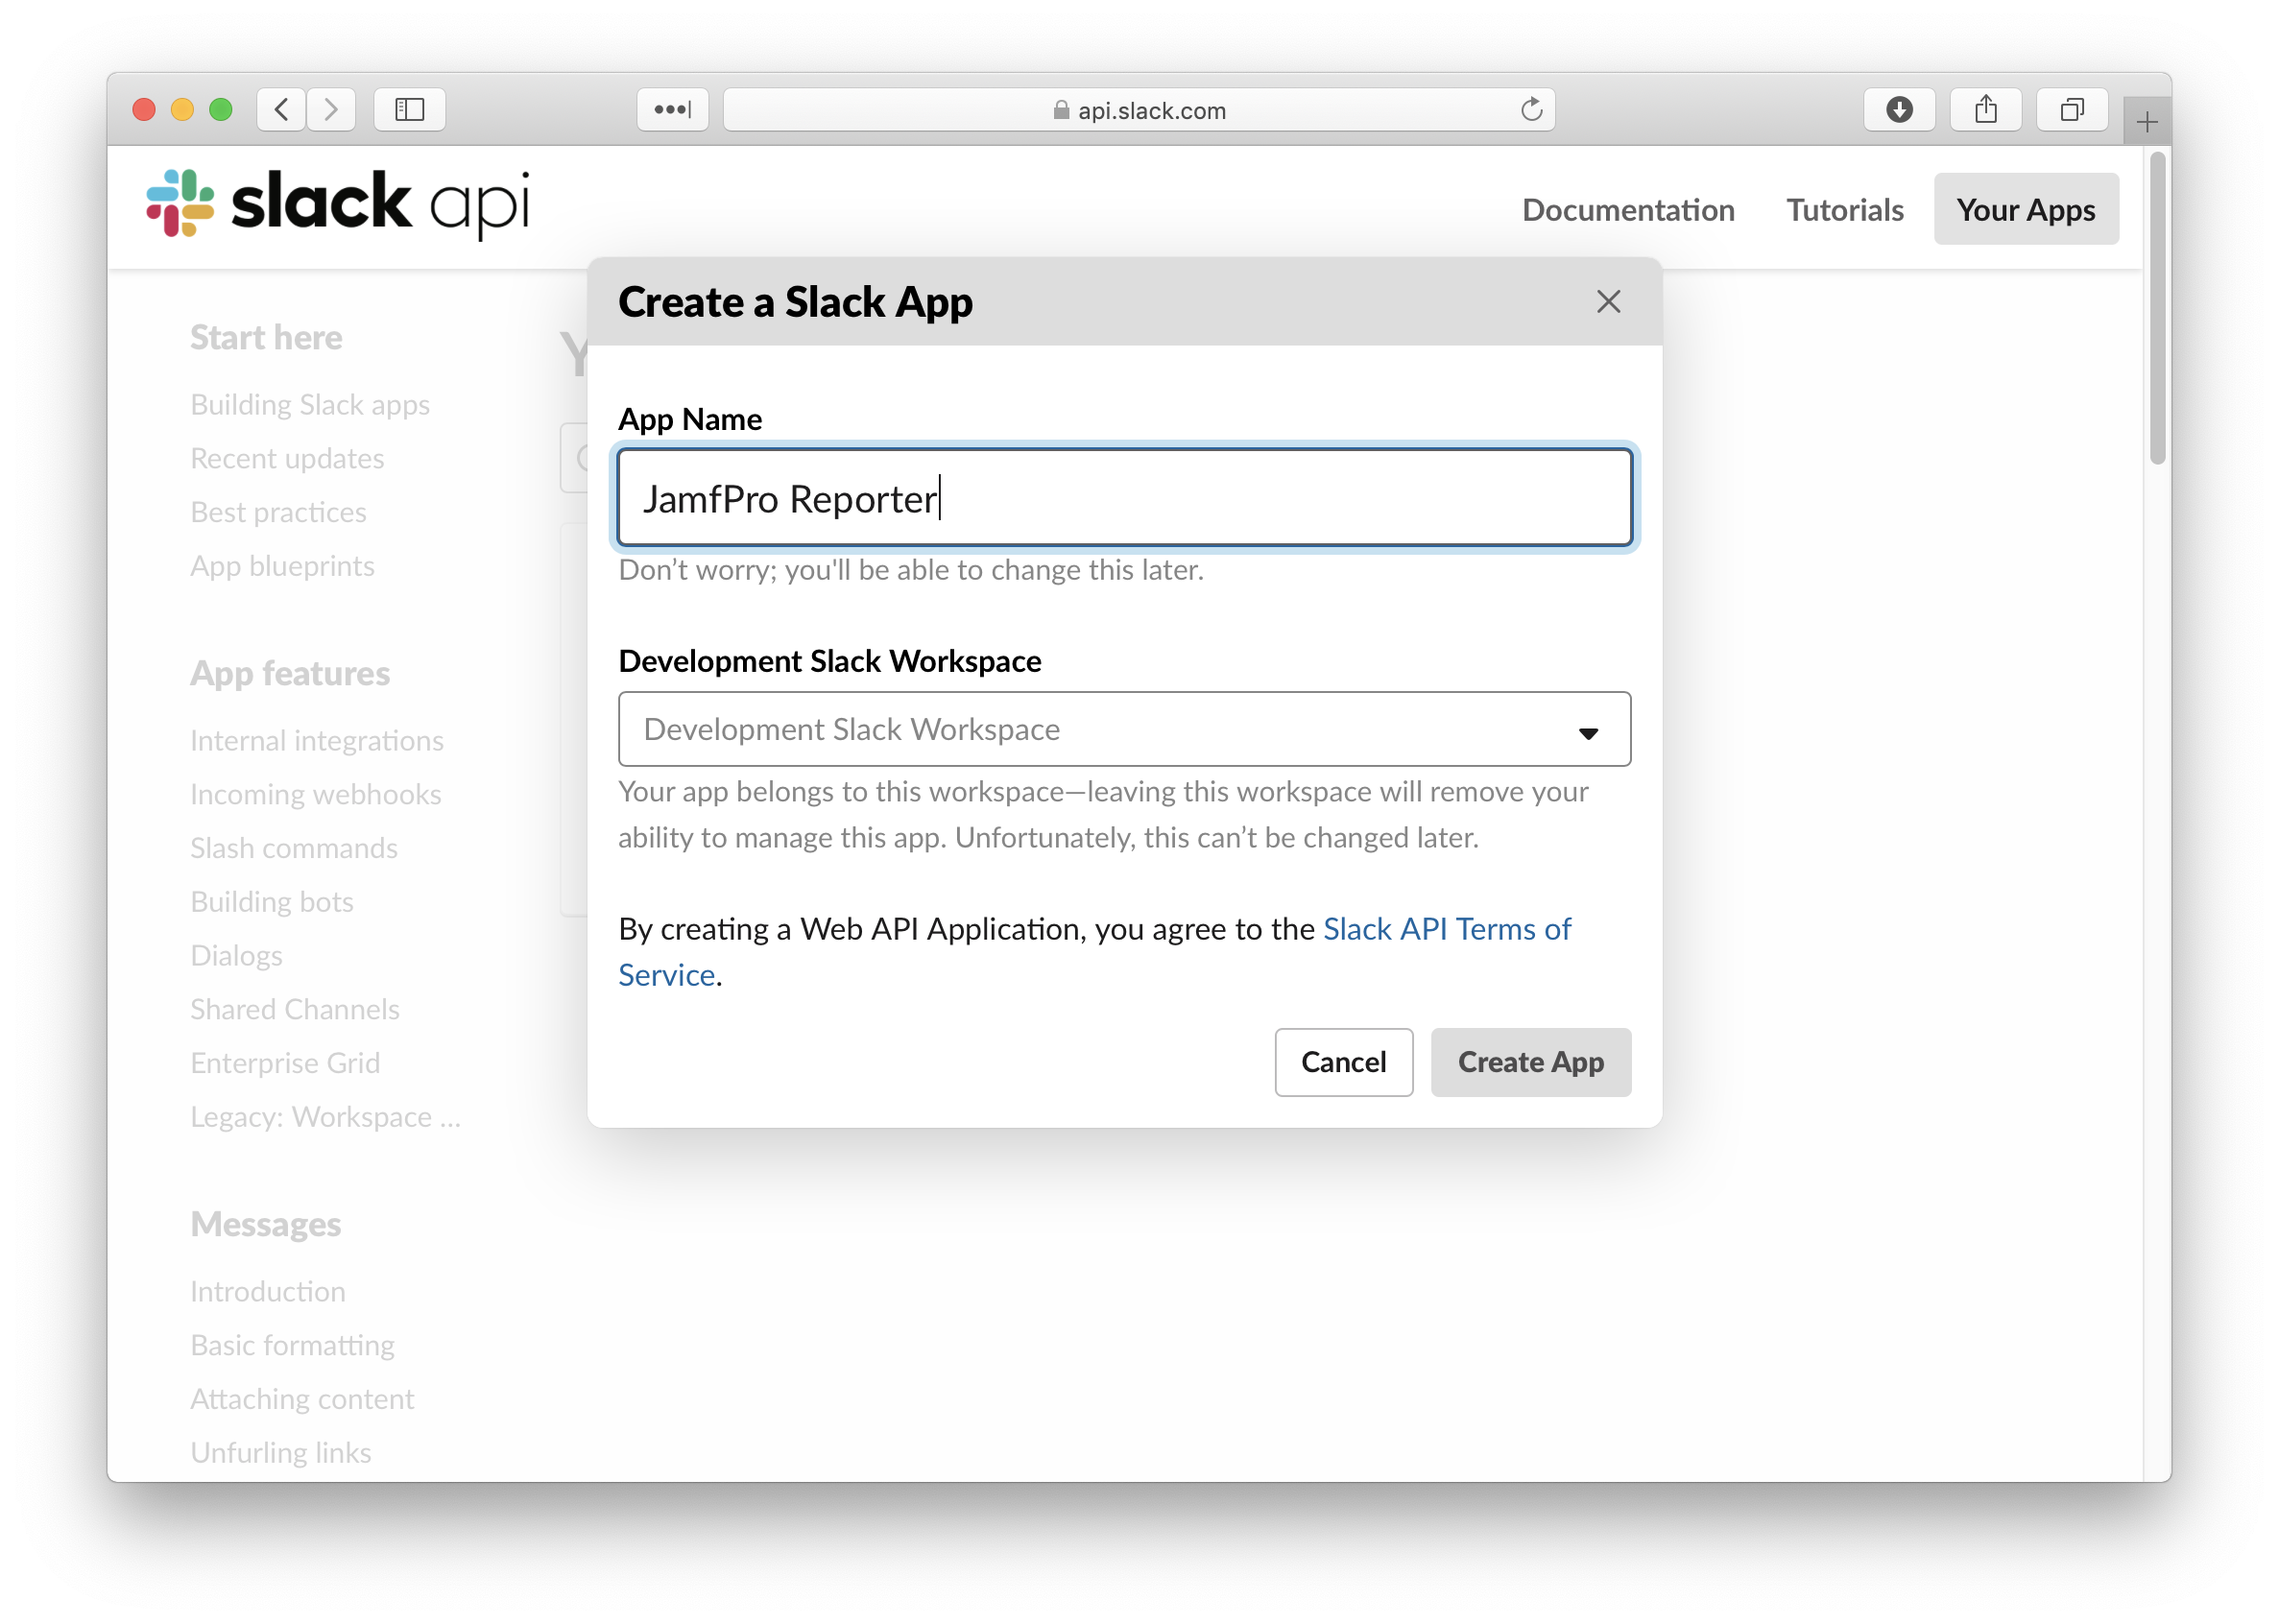
Give your app a name
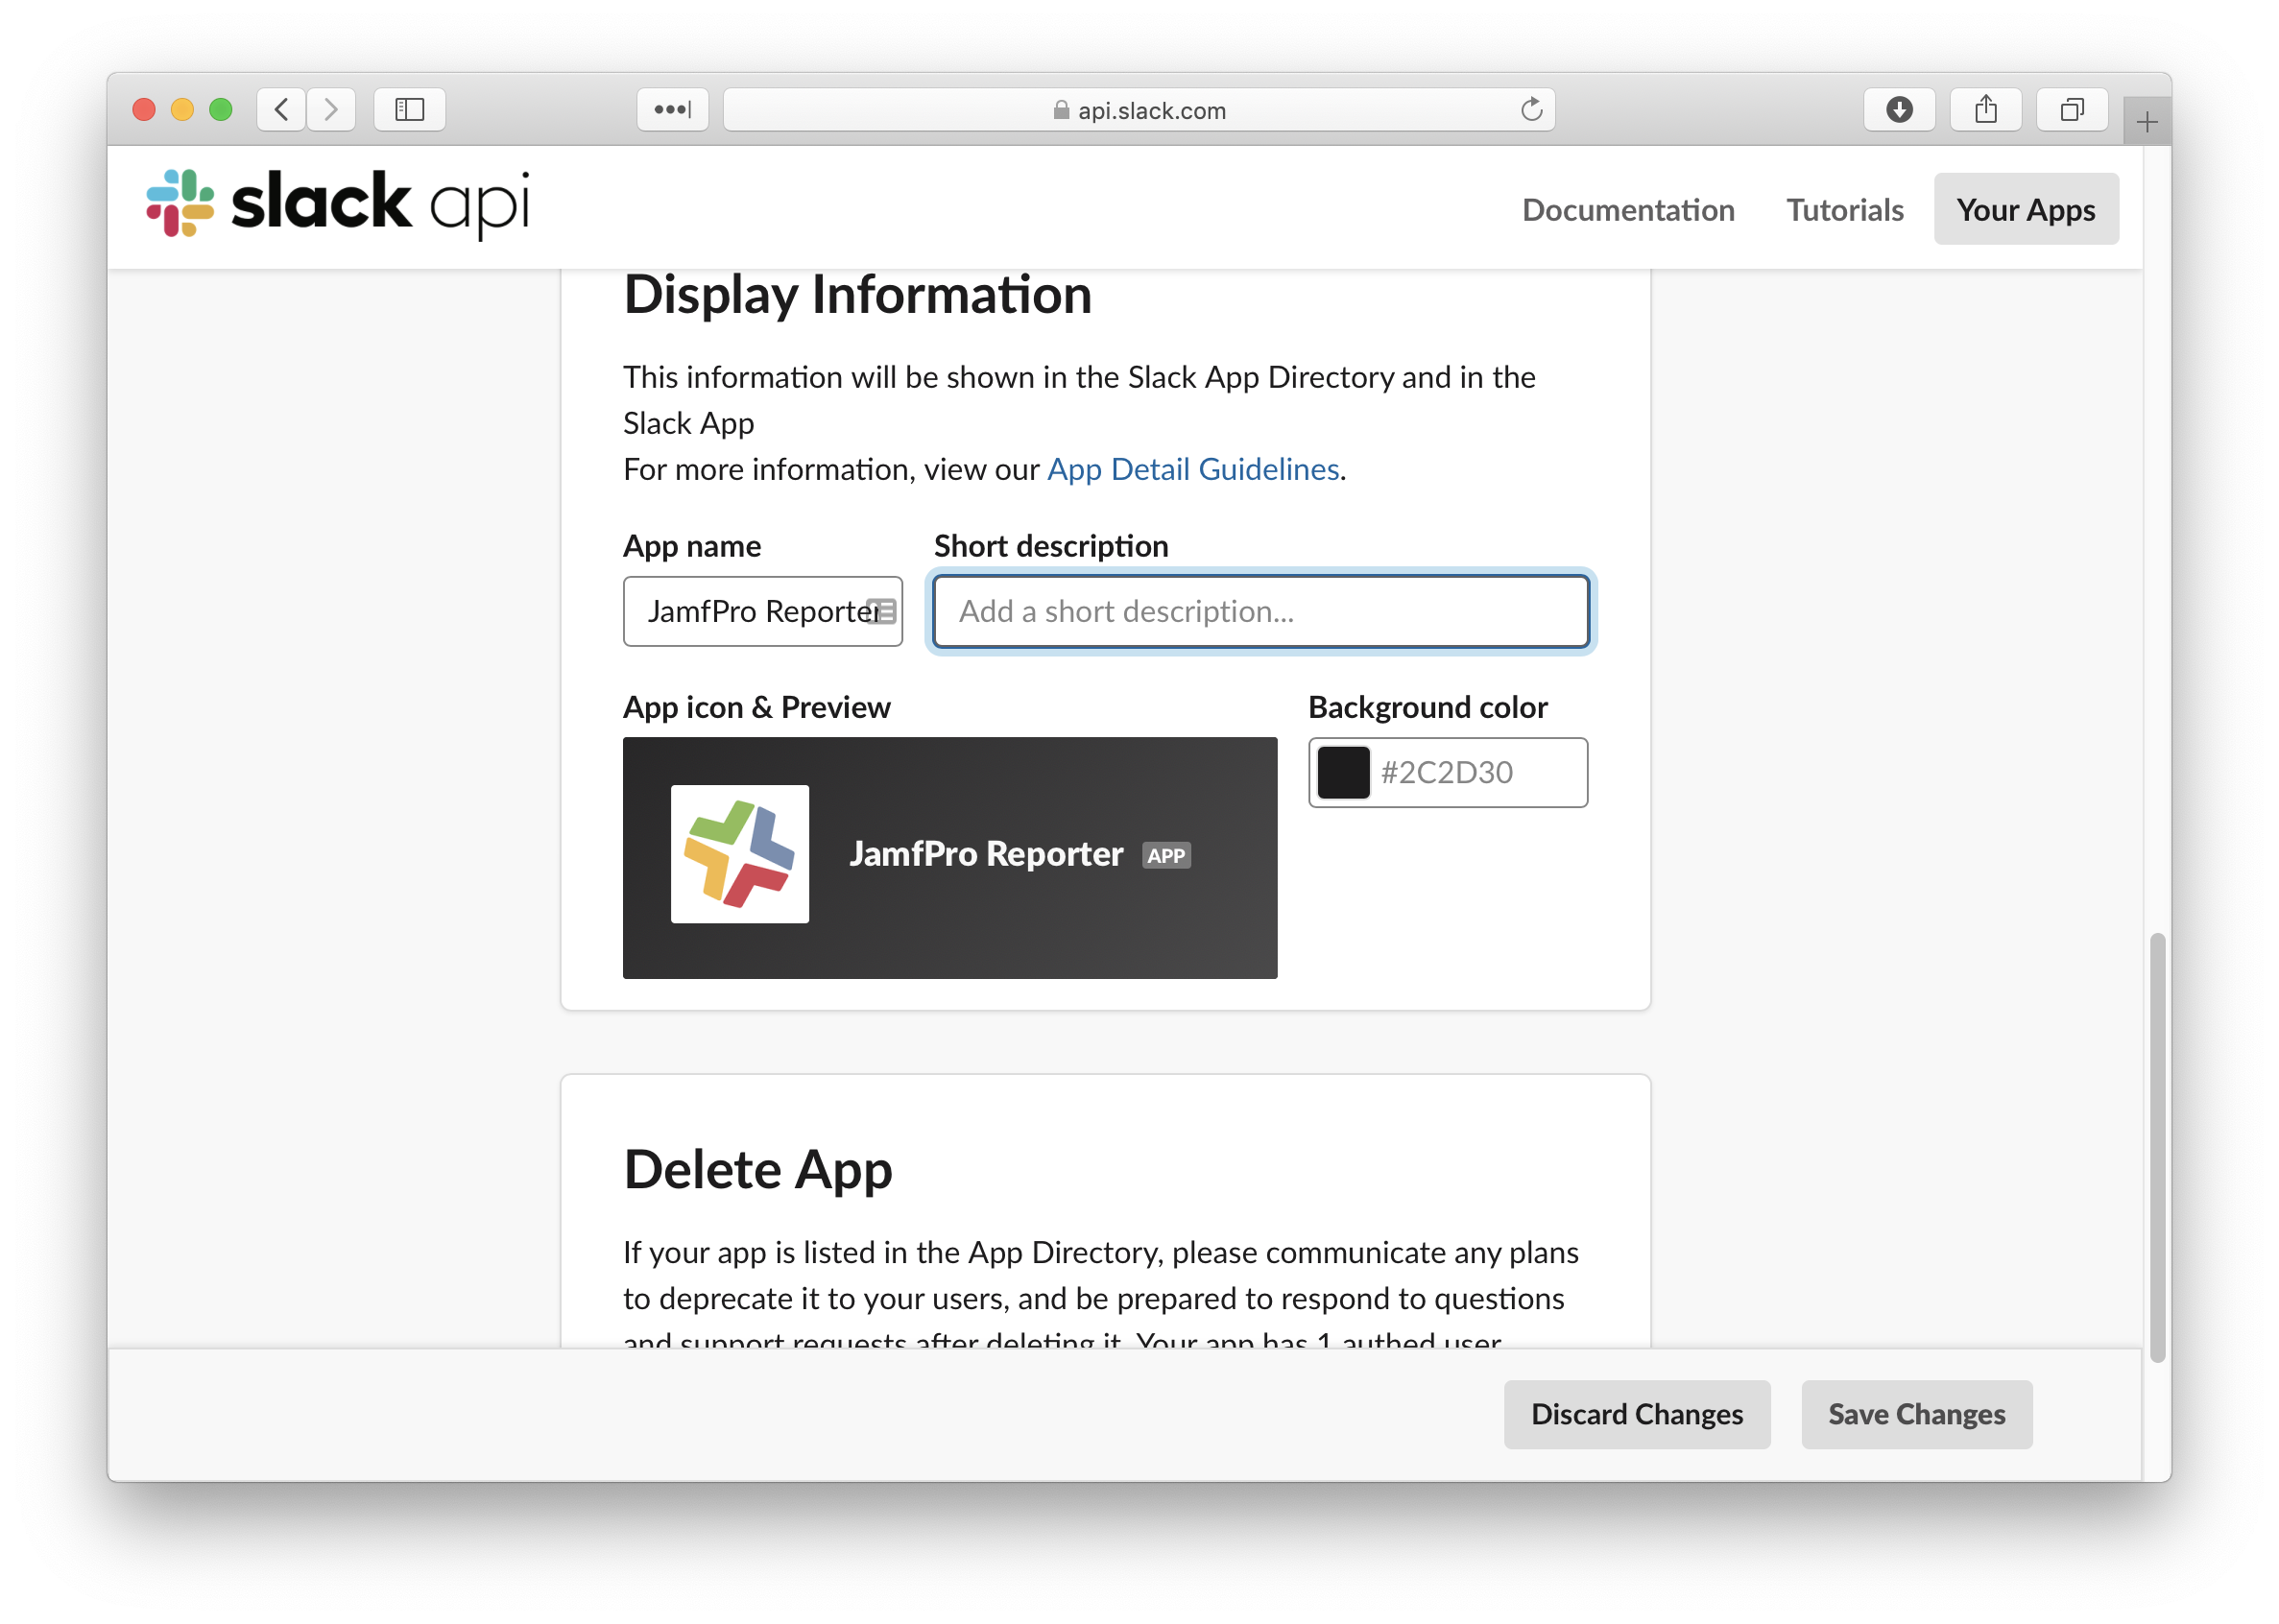
Give your app a nice looking icon
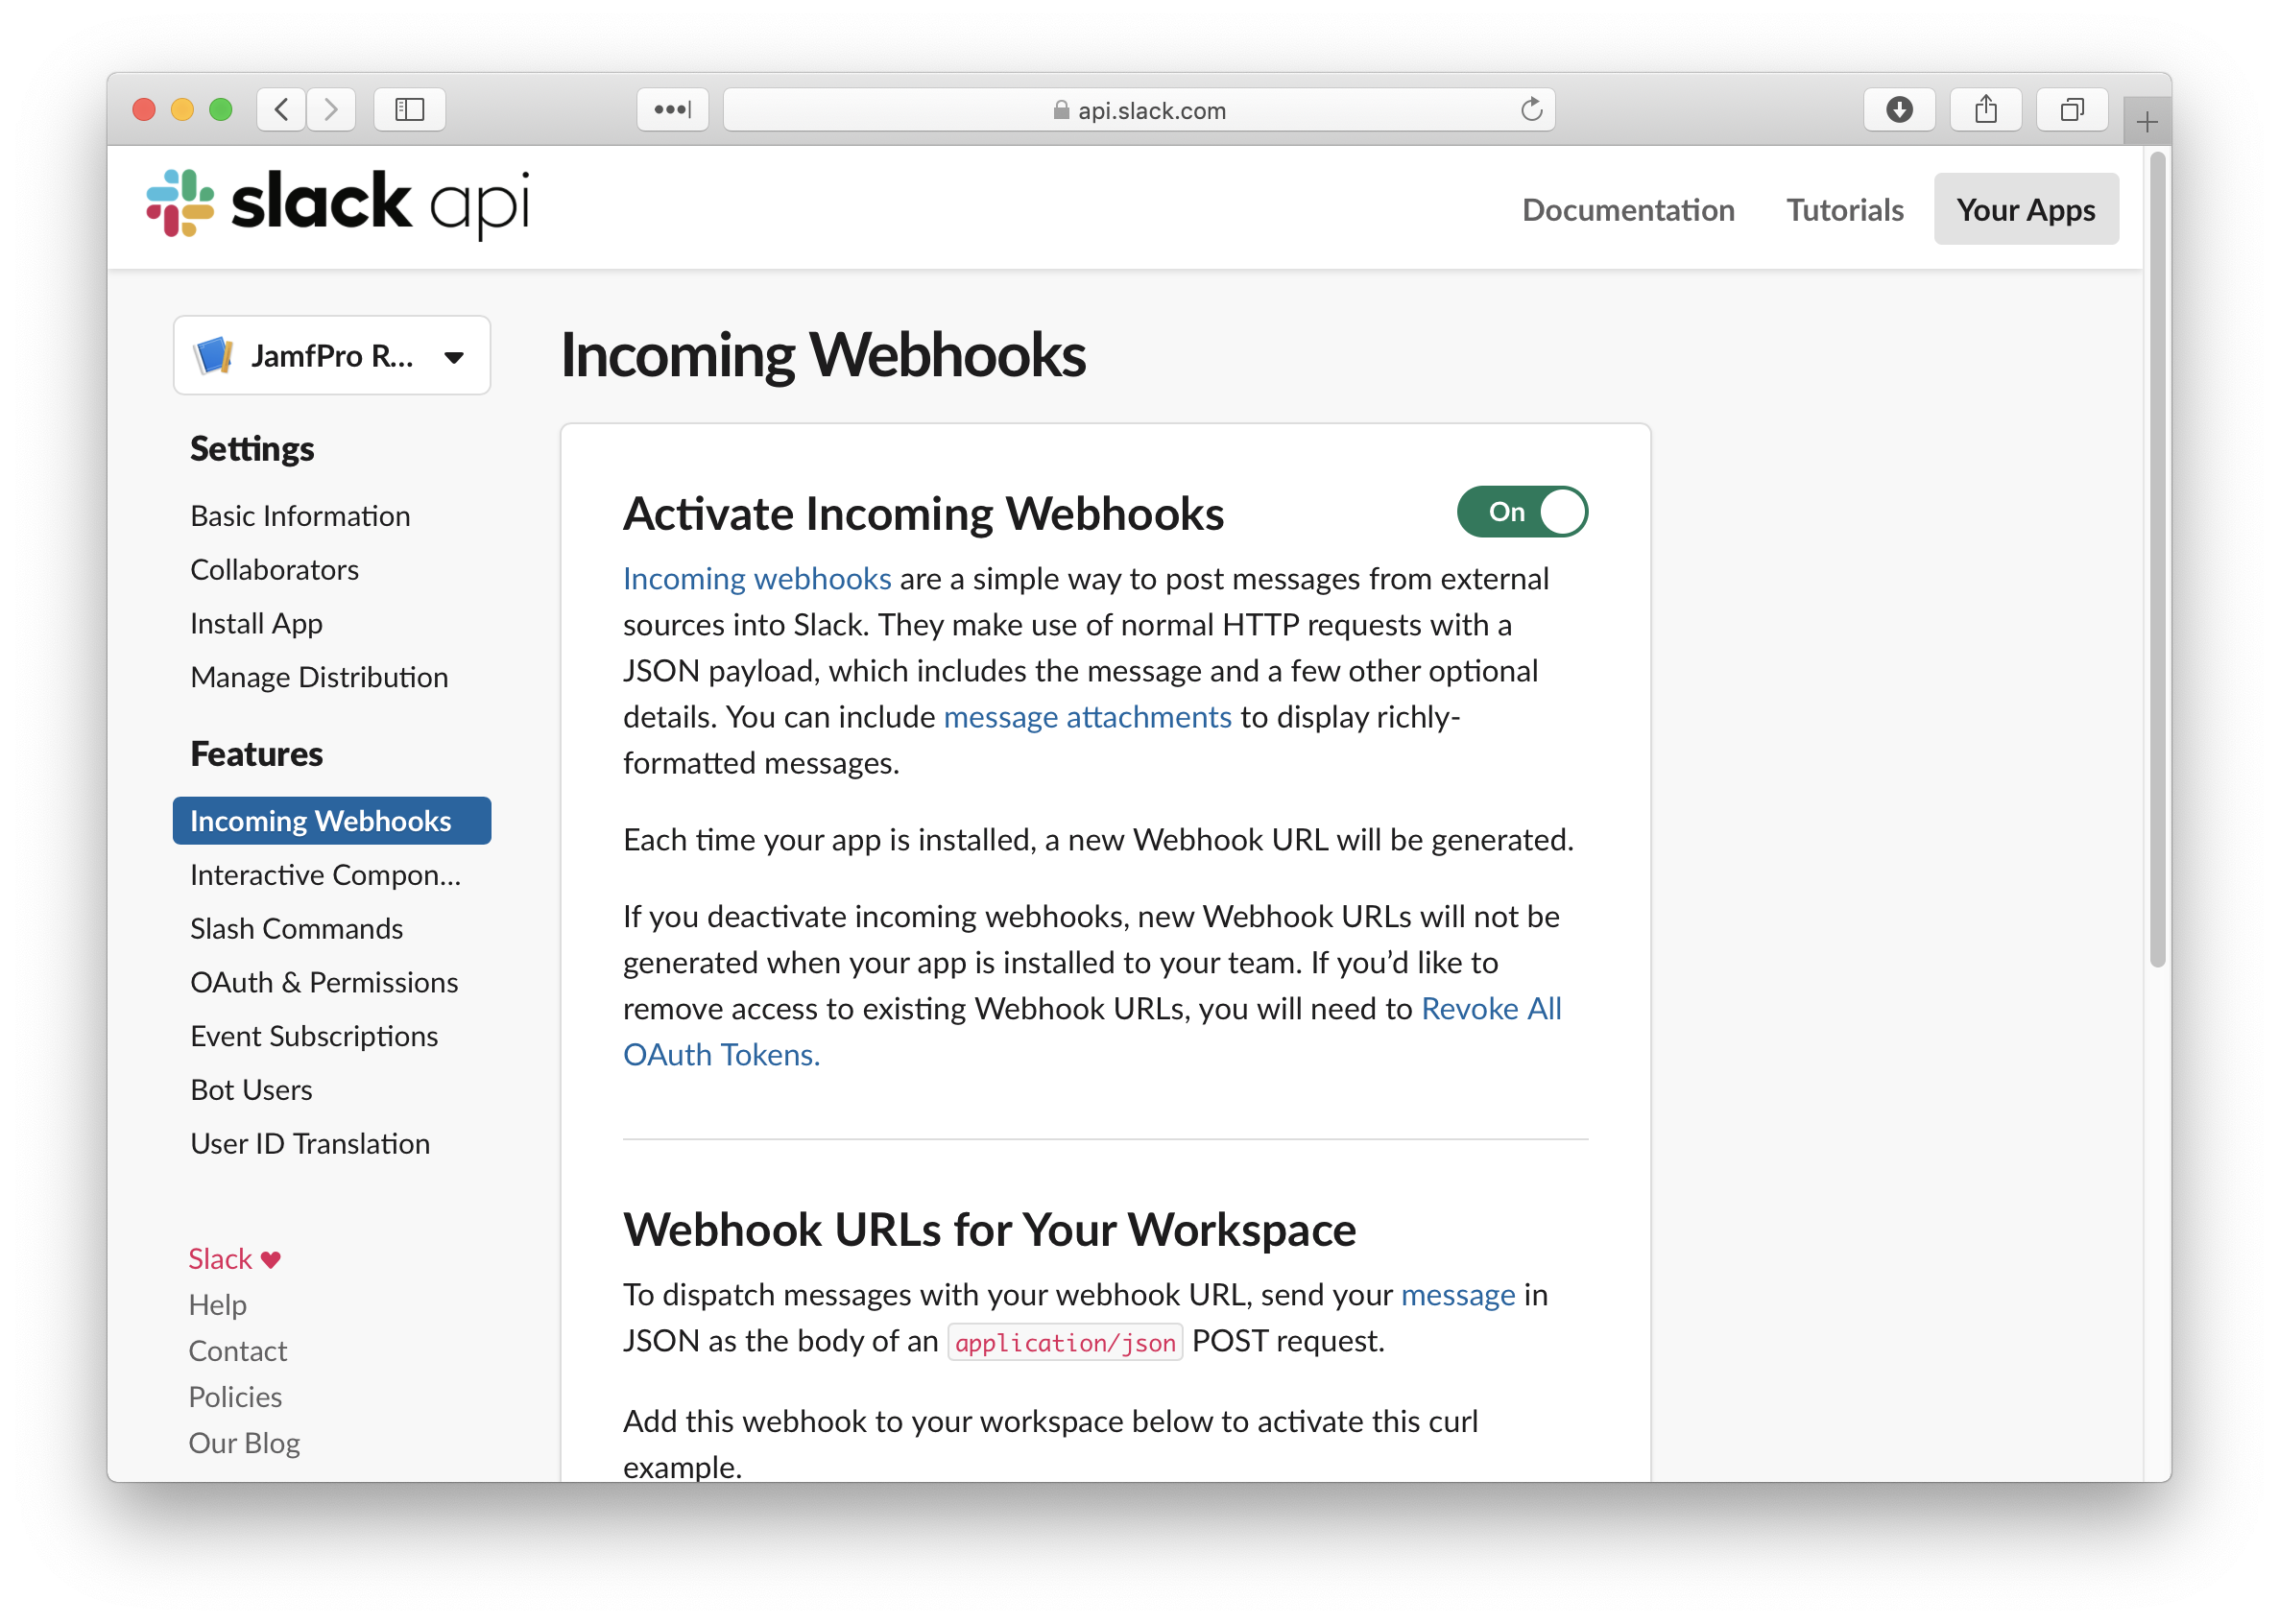
Go to Features > Incoming Webhooks > and toggle this feature on
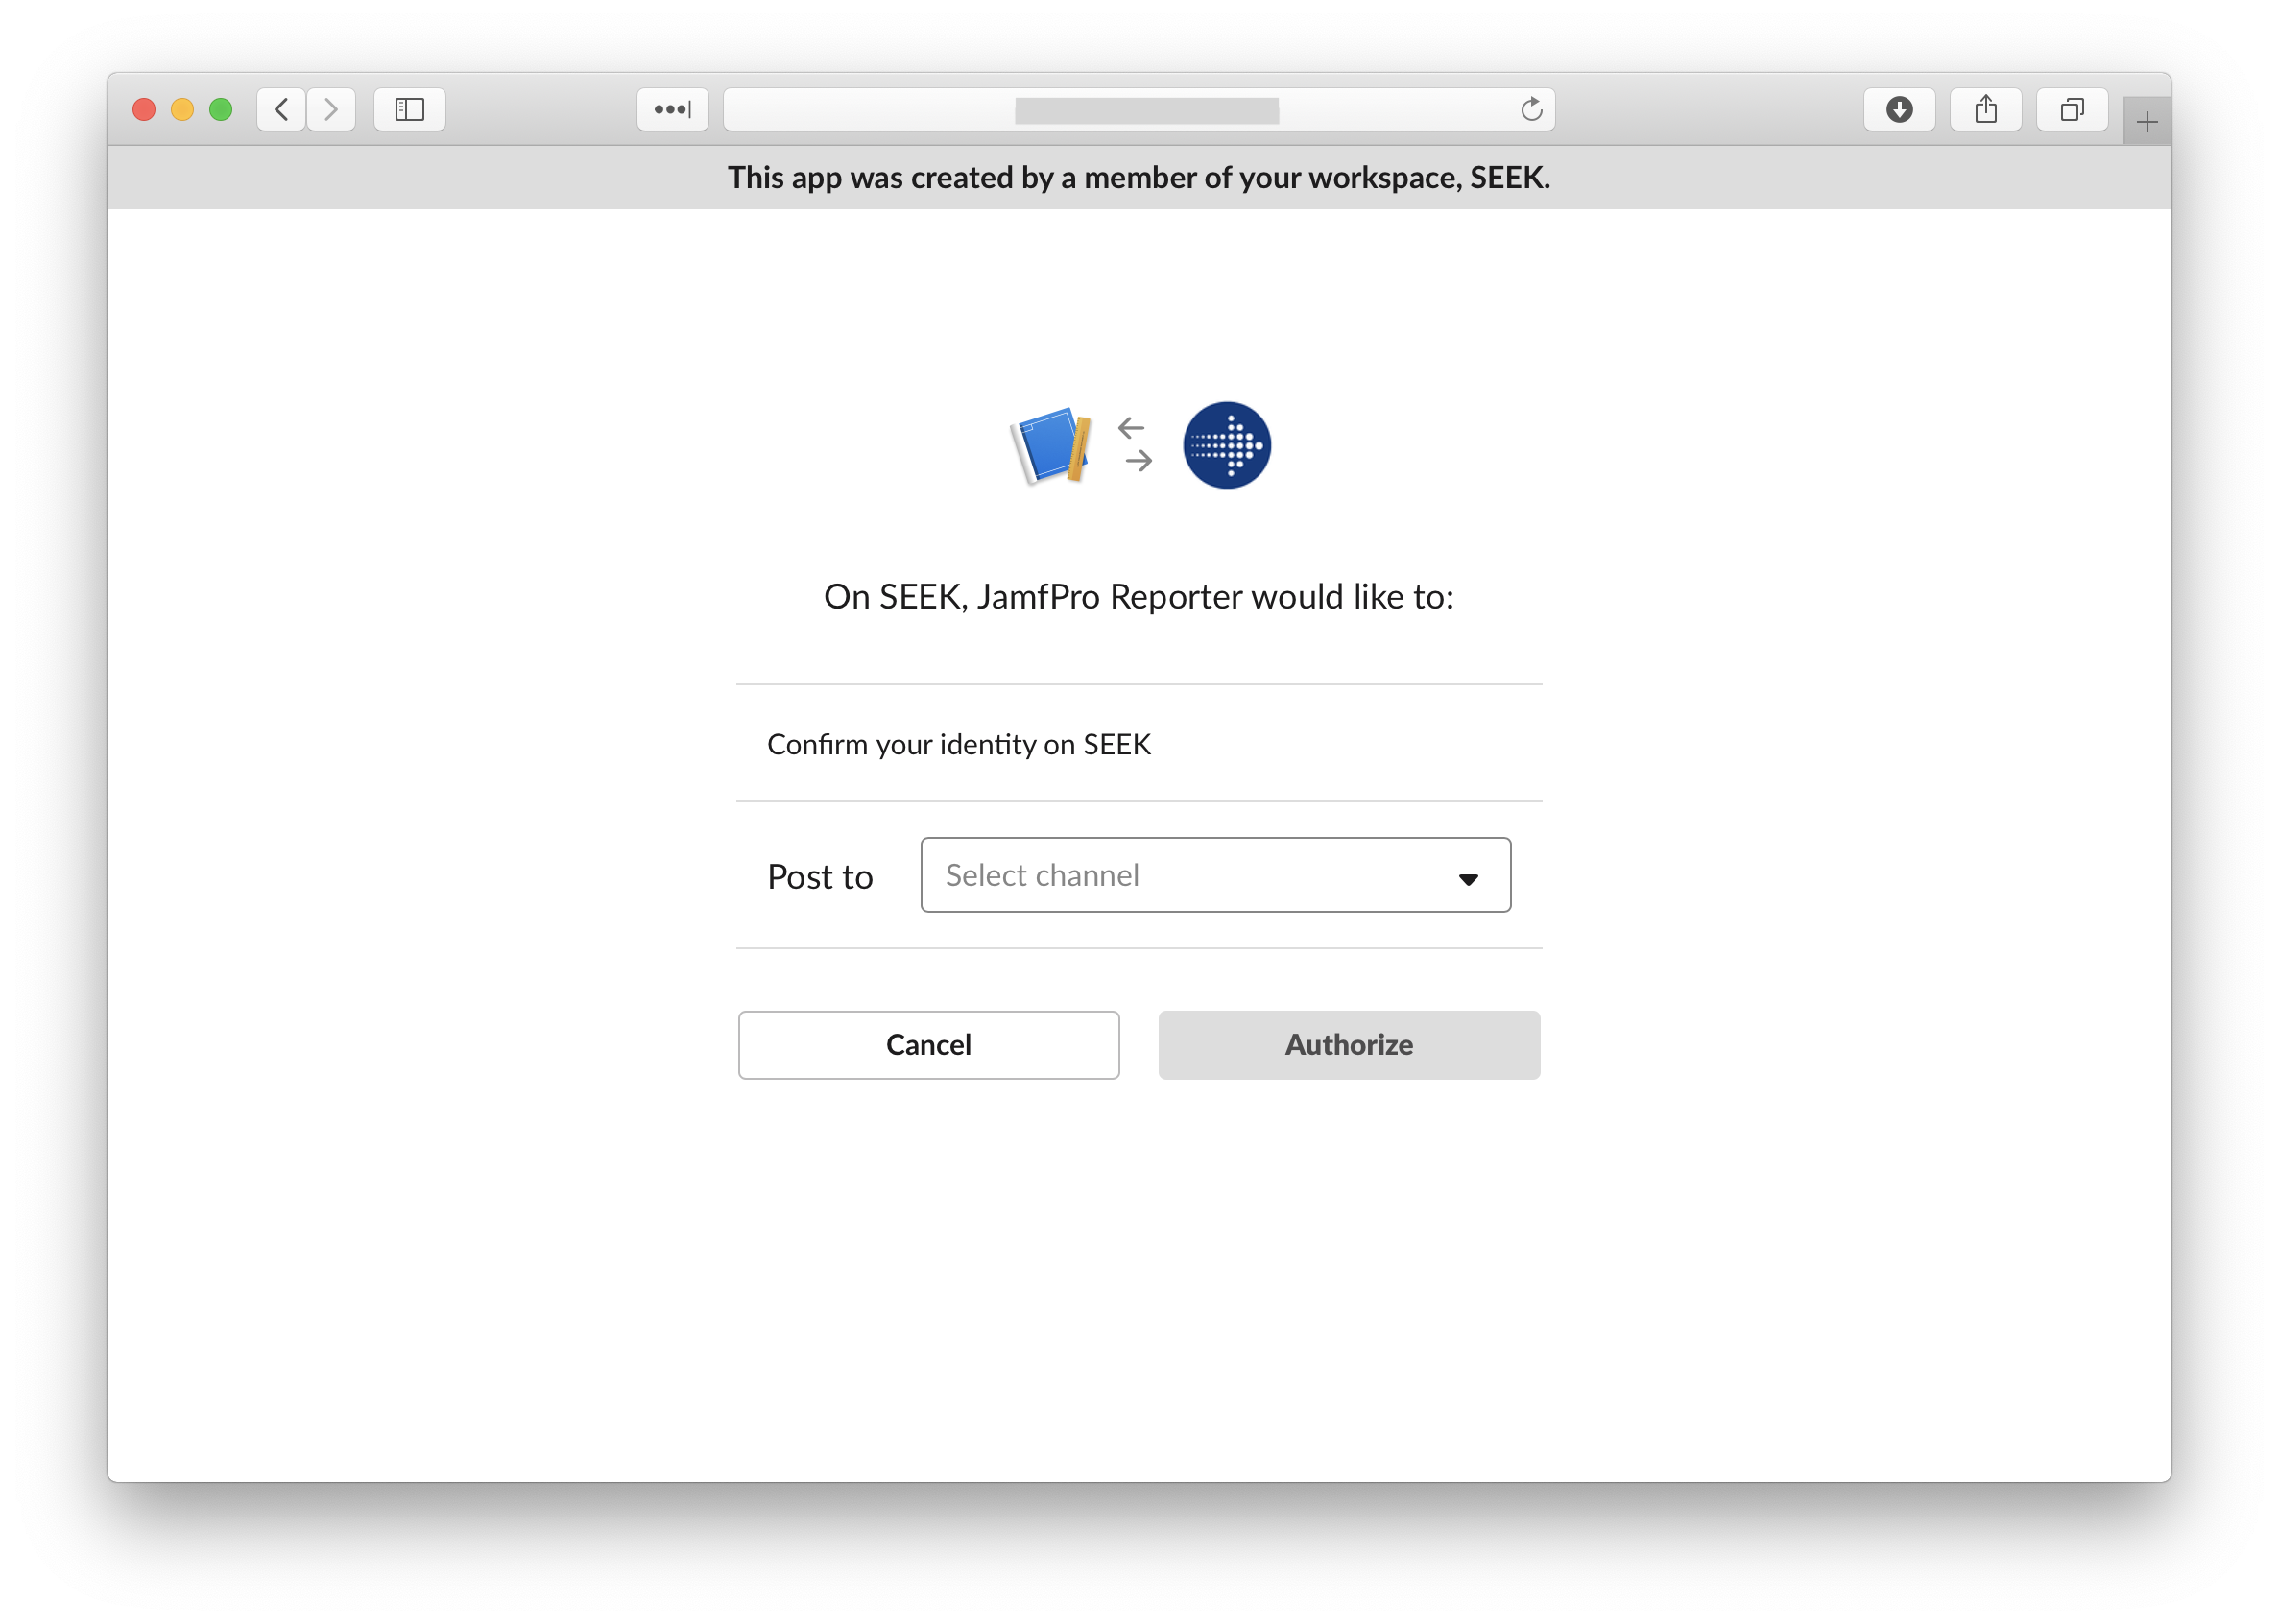
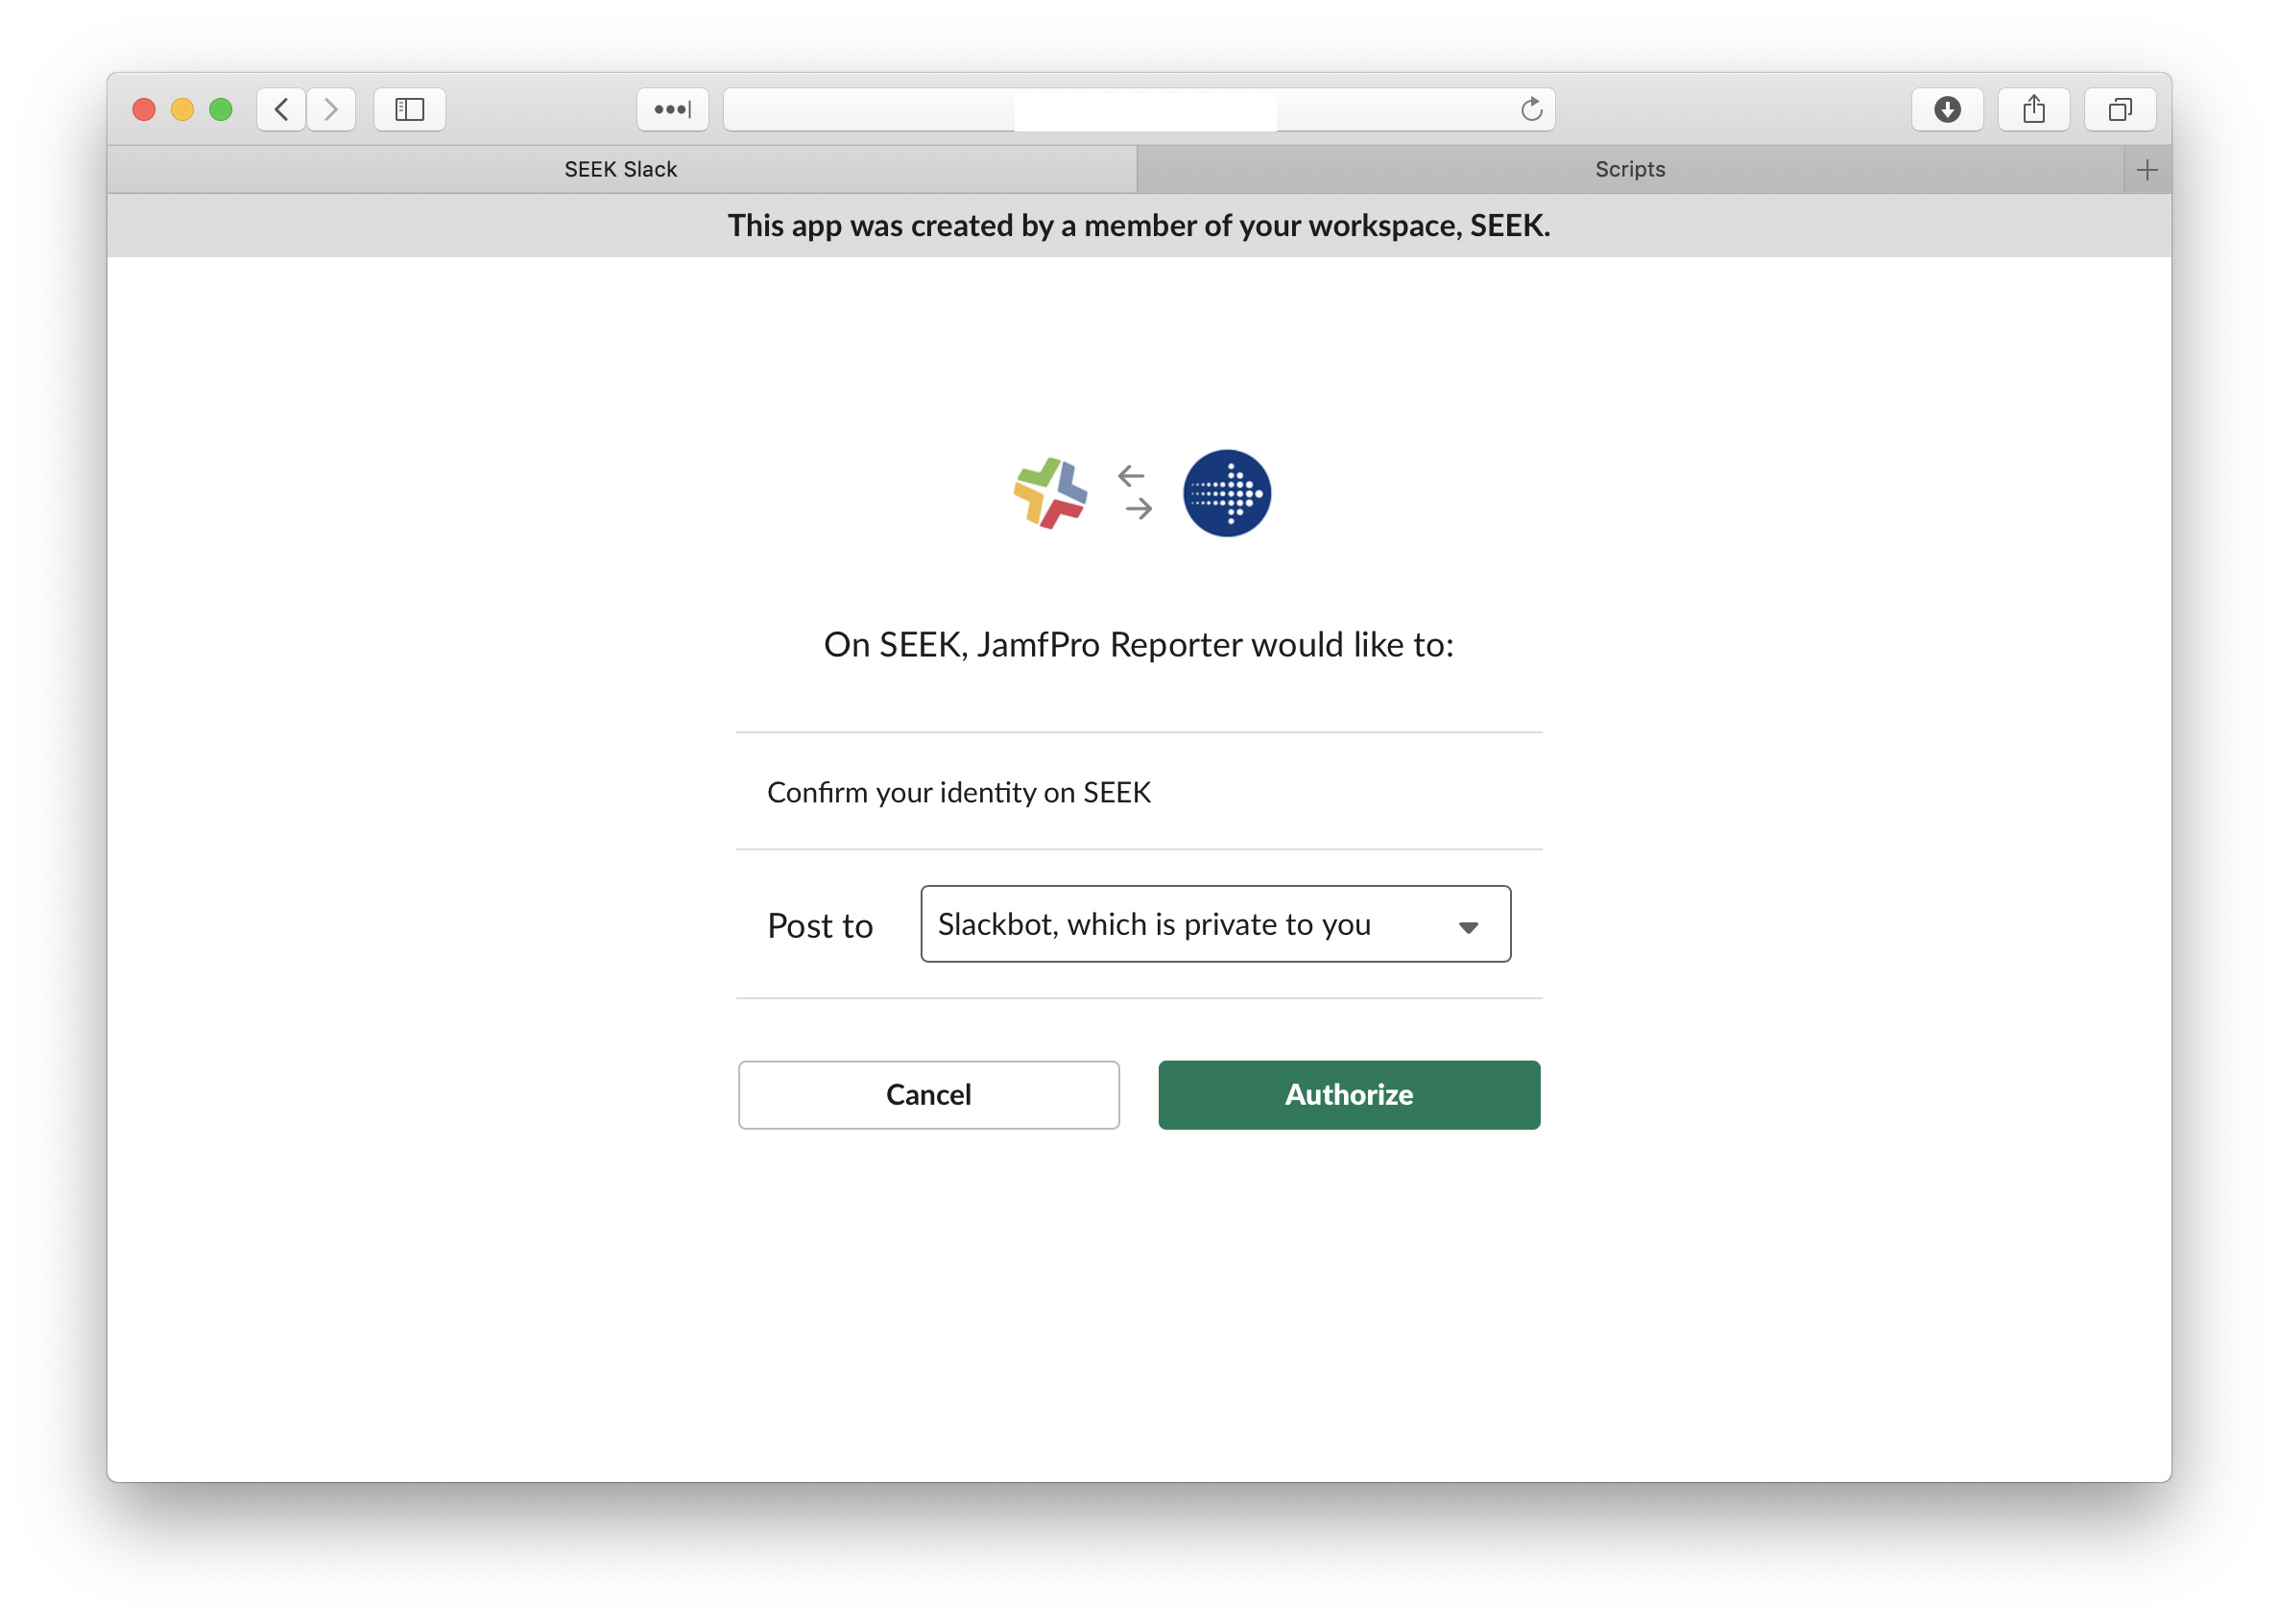
Select the channel you want this webhook to post to. I suggest you start off posting to Slackbot first, as that way all your testing will be visible to you only, before moving to a shared team channel
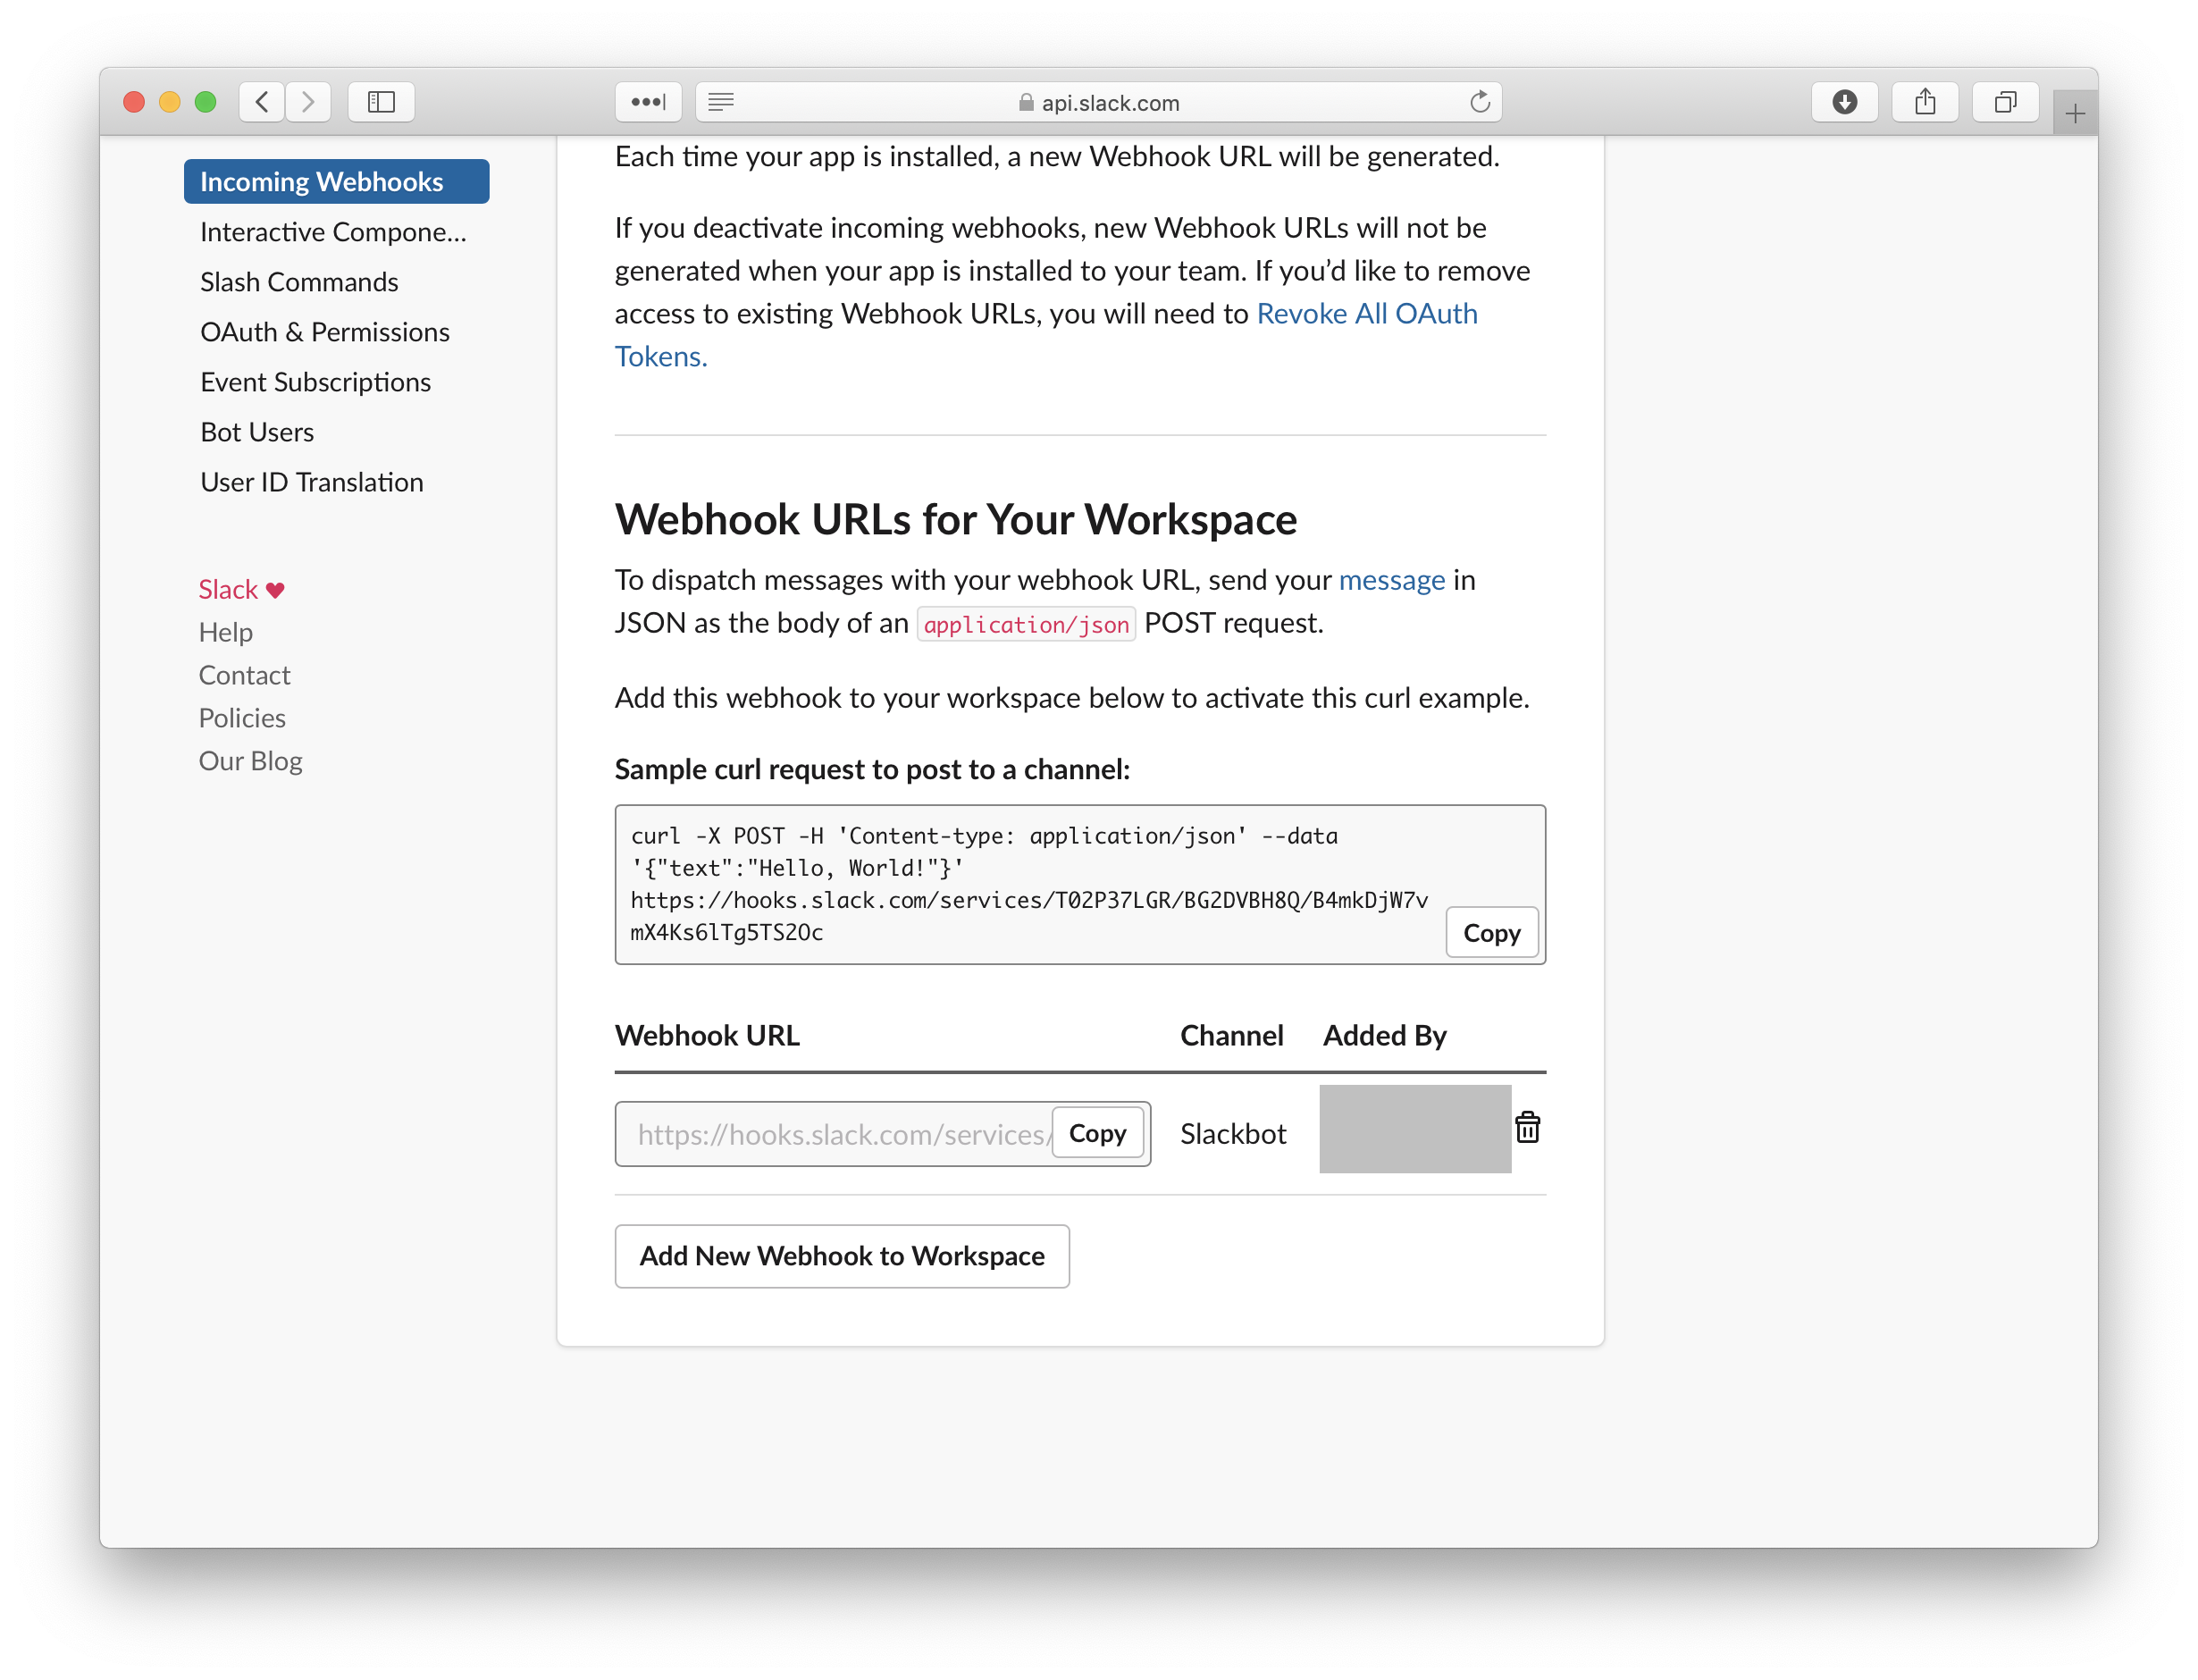
Copy the Webhook URL – going to need it for the script below!

That’s all that’s required on the Slack side of things, and now you just need to create a new JSS script that will be the policy payload to be run at the end of each completed Mac setup.

To post to Slack from a bash script is straightforward enough – just a single curl command to the webhook URL that Slack provided us above.

curl -sk -d payload=”$JSON” “$WEBHOOK_URL”

The trick is getting the JSON string that you are sending through to include all the correct parameters. Slack provides some good formatting tips but the basic post that I went with uses the following JSON content:

{

“text”: “<title of post>” ,

“attachments”:

[{“thumb_url”: “<post image url>”,

“color”: “<color of left border line>” ,

“text”: “summary text, with all quotes and single quotes escaped”

}]

}

The color is defined by the word “good” which gives us a green left-border, or “danger” which gives us the red.

The script preceding the curl command is just getting all the values that we want to include in the summary text, and making the checks that we need to confirm if the color attribute should be a “good” or “danger”:

Just like how the color attribute is defined by whether any issues were encountered, we could do the same with the image link – so that there is a happy/sad Mac image based on the result, making failed deployments even clearer. Another way to make failed deployments clearer is to add an @here to the text (if your team’s Slack etiquette allows that is).

I think I could also improve the script by including more extensive post-deployment testing to the script – such as a confirmation that the relevant security agent processes are running, and validating that the username of the account that is created actually exists in AD.

Using Trigger to present a form

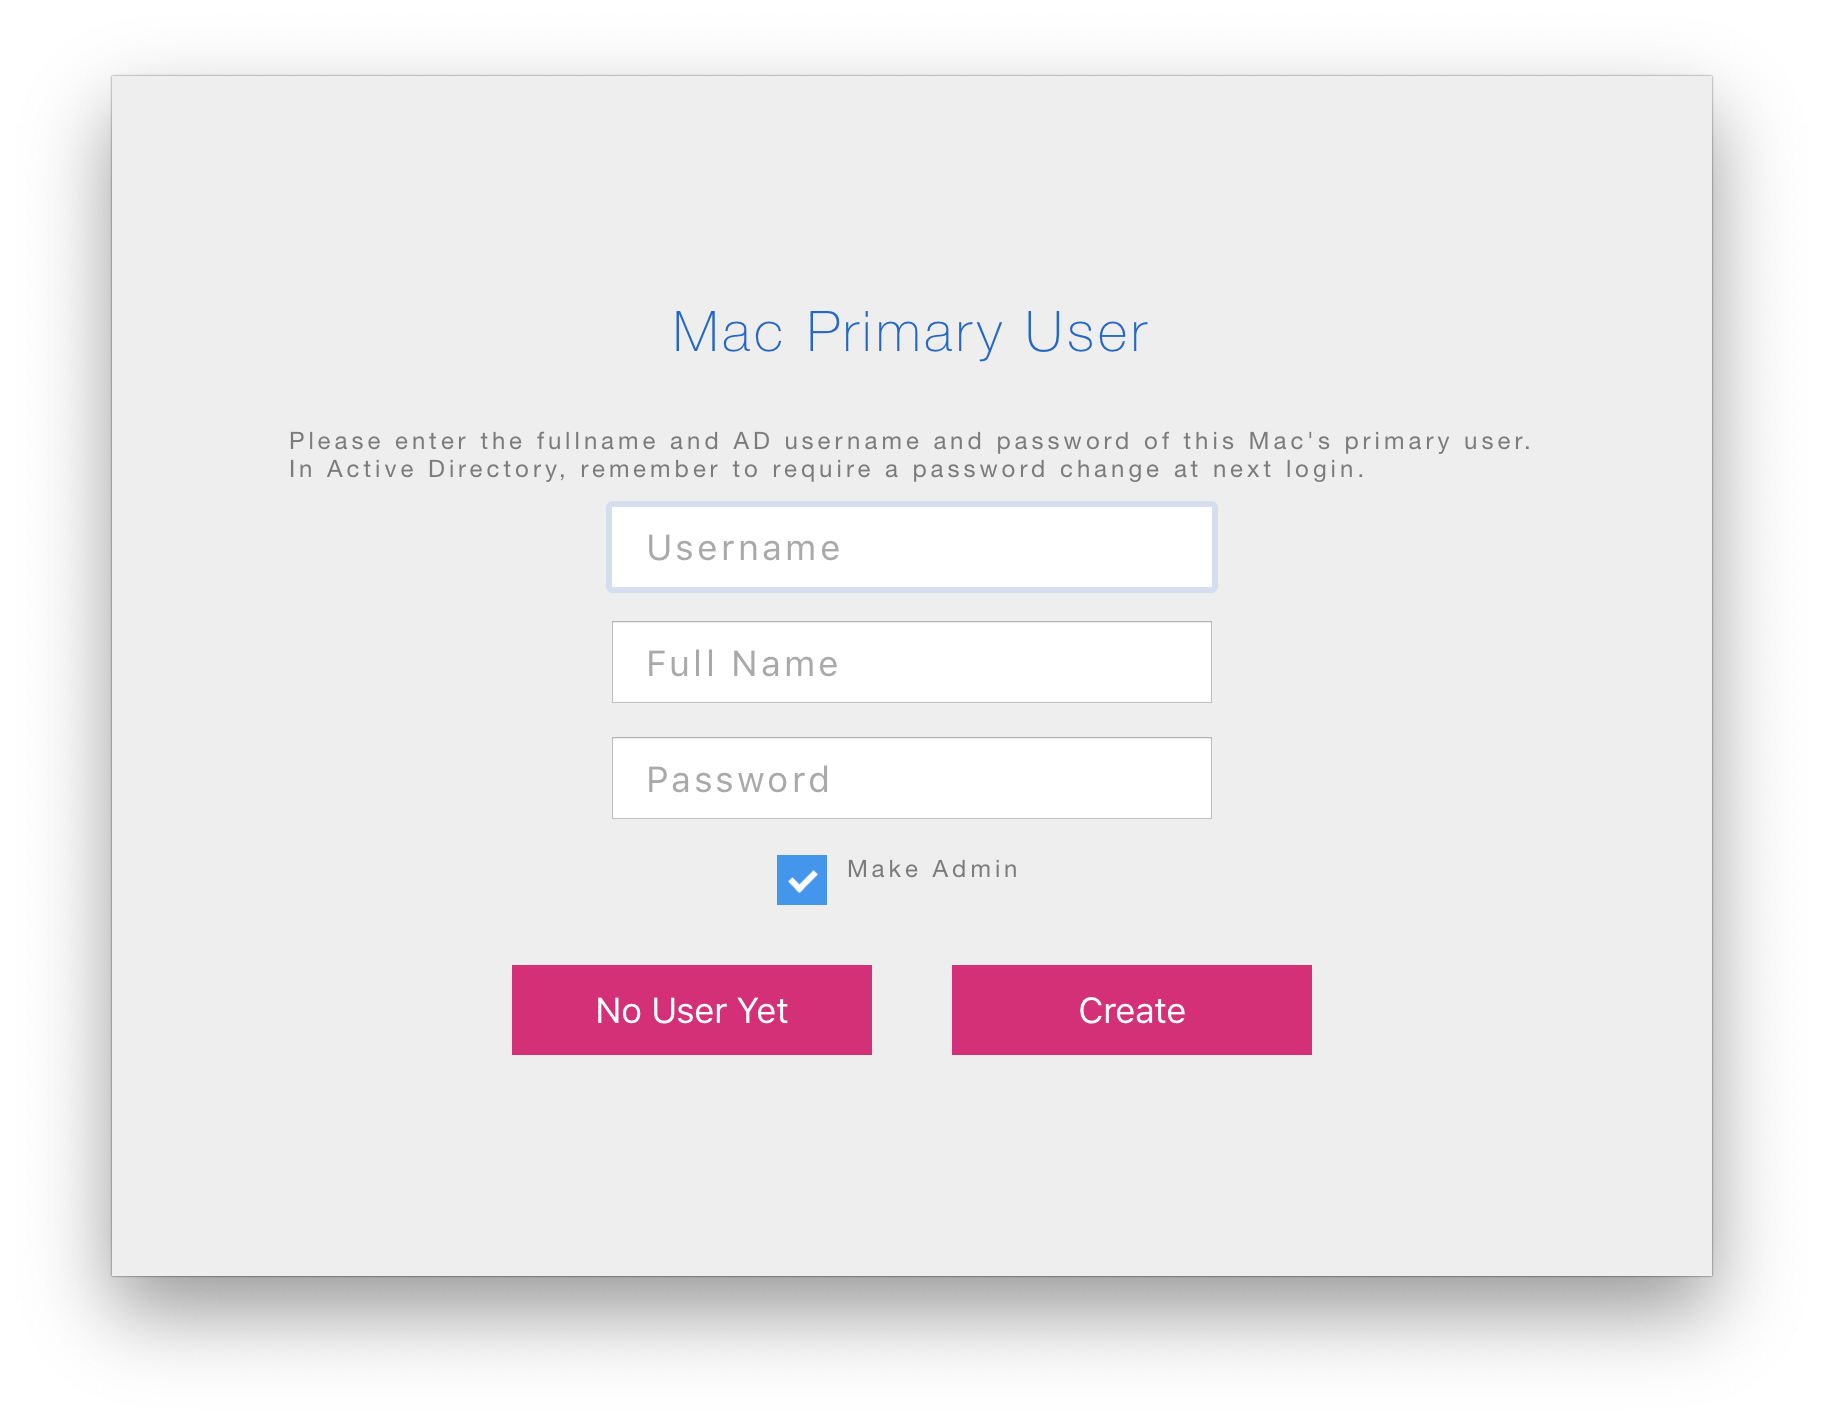
I use Trigger in our Mac deployment workflow to prompt the deployment technician on the details of the Mac’s end user. I use this information to then create the user account, enable the newly created account for FileVault, and to give them administrator rights, if required.

All of this is run from the one JSS script that:

  • creates the HTML file to present in the web view,
  • runs Trigger so that the web view is presented (and waits for the user to click one of the two button options,
  • parses the results and then calls the functions required to create the user account, enabled FileVault, and provide administrator rights accordingly.
Example web view to prompt the deployment tech for the end-user details
Javascript function in the web view code prevents the Create button from working until all three input textfields are filled, and highlights the fields that are missing.I

For the sake of simplicity, I’ve commented out the functions that do the actual grunt work of creating the user account and enabling FileVault, but I will share the code in a future post if there is any interest.

Trigger, a utility for macOS admins.

What does it do? Trigger is a command-line utility that presents a web view while simultaneously executing a shell command. You can give Trigger more than one web view and command to present, in which case it will move on to the next pair once the previous command finishes executing. If the web view content has form input elements, eg. a checkbox, placed within the <form></form> tags, Trigger can send the input val

How does one get it? Trigger is an open-source utility.

You can also get the latest pre-built .app here.

How exactly is it used? Below is the output of Trigger’s –help flag. I have also posted examples of how it can be used here

Usage:

Trigger.app/Contents/MacOS/Trigger webview1 command1 webview2 command2 ... [OPTIONS]

Trigger displays a web view while simultaneously executing a command. Once the command finishes executing Trigger moves on to the next web view/command pair.

WEBVIEW

The local HTML file or HTML string to display -f, –file OR -html, –html 

COMMAND

The command to execute. Command can be a shell command or a jamf binary command.

Example shell commands:

‘sleep 5’

‘/tmp/a_script.sh’

“/usr/sbin/installer -package ‘/tmp/CocoaDialog v2.1.1.pkg’ -target /”

Note the single quotes to wrap around the filename with spaces.

Accepted jamf commands:

All jamf verbs, although be warned that Trigger has only been tested with jamf binary versions 9.61 – 9.97, so far. Note: Trigger assumes that the binary is in /usr/local/bin/jamf. Specify fullpath if you relocated the binary.

Trigger needs to be run as root to run jamf commands.

Example jamf commands:.

“policy -trigger ‘microsoft office'”

‘policy -trigger vlc’

recon

There is one special Trigger commands: wait

wait displays the webView until a particular link on the presented HTML.

Trigger.app/Contents/MacOS/Trigger WEBVIEW wait

What occurs once the link is clicked depends on the url:
– A link to “next”, eg. <a href=”http://next”>NEXT</a>, makes Trigger proceed to the next web view/command pair.
– A link to “formParse”, eg. <a href=”http://formParse”>Submit</a>, will inspect any form values and return the results to stdout. before proceeding to the next web view/command pair.
– A link to “quit”, eg. <a href=”http://quit”>Done</a>, terminates Trigger.
Be sure to add http:// in the link URL (required by macOS 10.12.4+)

COMMAND,NAME

If an output file is specified (see ‘-o, –output’ option below), all named commands have their stdout and success status written to this file. A command is named by appending a comma followed by the name in quotations. eg. “policy -trigger mcafee”,”McAfee Security Agent”

OPTIONS

-t,–title <title> Title of the Trigger window. By default there is no title.

-h, –height Height, in pixels, of content window. Default height is 320px.

-w, –width Width, in pixels, of content window. Must be within the minimum and maximum width of the content window. Default width is 360px.

–noTitleBar, –notitlebar Hides the titlebar.

–fullscreen Puts the Trigger webView in fullscreen mode, and disables process switching, the dock, the apple menu, the menubar, and although the expose funtion key still works the user will be unable to switch to another application. Shift-command-Q for logout will work. There is no title bar when in fullscreen mode.

–blurry Applies a blurry overlay to the screen, behind the webView. Cannot be used in conjunction with –fullscreen.

-o, –output Creates an output html file. All named commands have their results written to it.

EXAMPLES

/usr/local/Trigger.app/Contents/MacOS/Trigger --file /tmp/power_prompt.html wait --width 800 --height 600
/usr/local/Trigger.app/Contents/MacOS/Trigger --file /tmp/progress_wheel.html 'sleep 5'
/usr/local/Trigger.app/Contents/MacOS/Trigger --file /tmp/installing_word.html "jamf policy -trigger 'word 2019'" --width 800 --height 600 --blurry
/usr/local/Trigger.app/Contents/MacOS/Trigger --file /tmp/installing_word.html "/usr/sbin/installer -package '/tmp/CocoaDialog v2.1.1.pkg' -target /" --fullscreen